How To Use Assistive Access On Iphone Or Ipad With Ios 17
What is Assistive Access in iOS 17? How to turn on and set up Assistive Access in iOS 17 or iPadOS 17 How to use Assistive Access on your iPhone or iPad How to exit Assistive Access mode on iPhone or iPad
What is Assistive Access in iOS 17?
Assistive Access is a unique feature for people with cognitive disabilities. It lets users control their devices using simple gestures instead of pressing buttons. Besides, there are easy-to-use tools like voiceover, magnification, and switch control to make navigation easier. Note that when you turn on Assistive Access, it modifies your device’s appearance and user interface. You will only see crucial apps and limited system elements. It blocks system notifications, updates, and privacy-concerned info. Also, you need to choose which app features to allow in this mode.
Requirements to use Assistive Access
Before you turn on and use Assistive Access on your iPhone or iPad, meet the below requirements.
Add the Face ID of the person who will be using Assistive Access. Install the required apps that the person needs to use during Assistive Access. Save the vital contact information so the person can quickly call or message them. Set up Siri so the person can use voice commands to control their device. Connect the device to Wi-Fi or cellular data so the person can access the internet and use apps that require an internet connection. Set a passcode for the device so it is protected from unauthorized access.
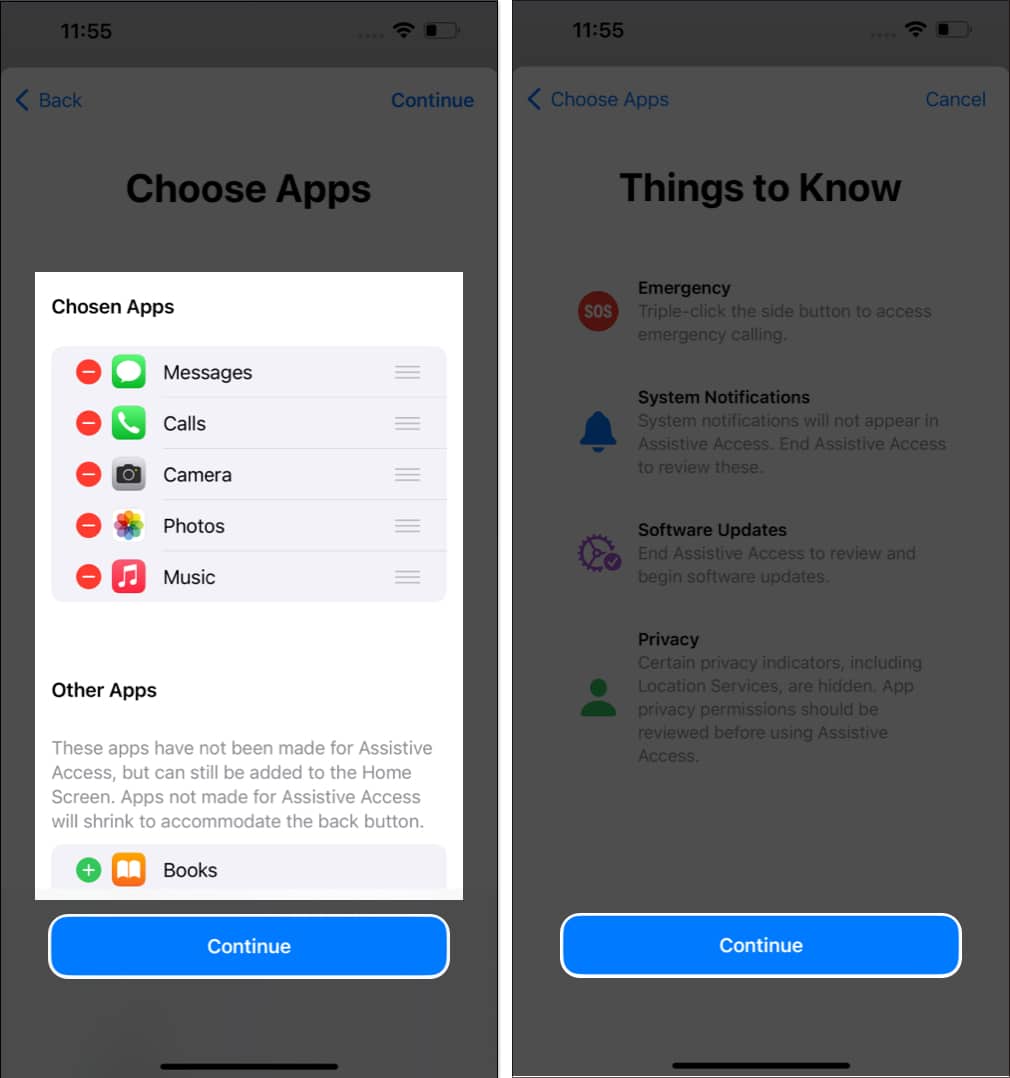
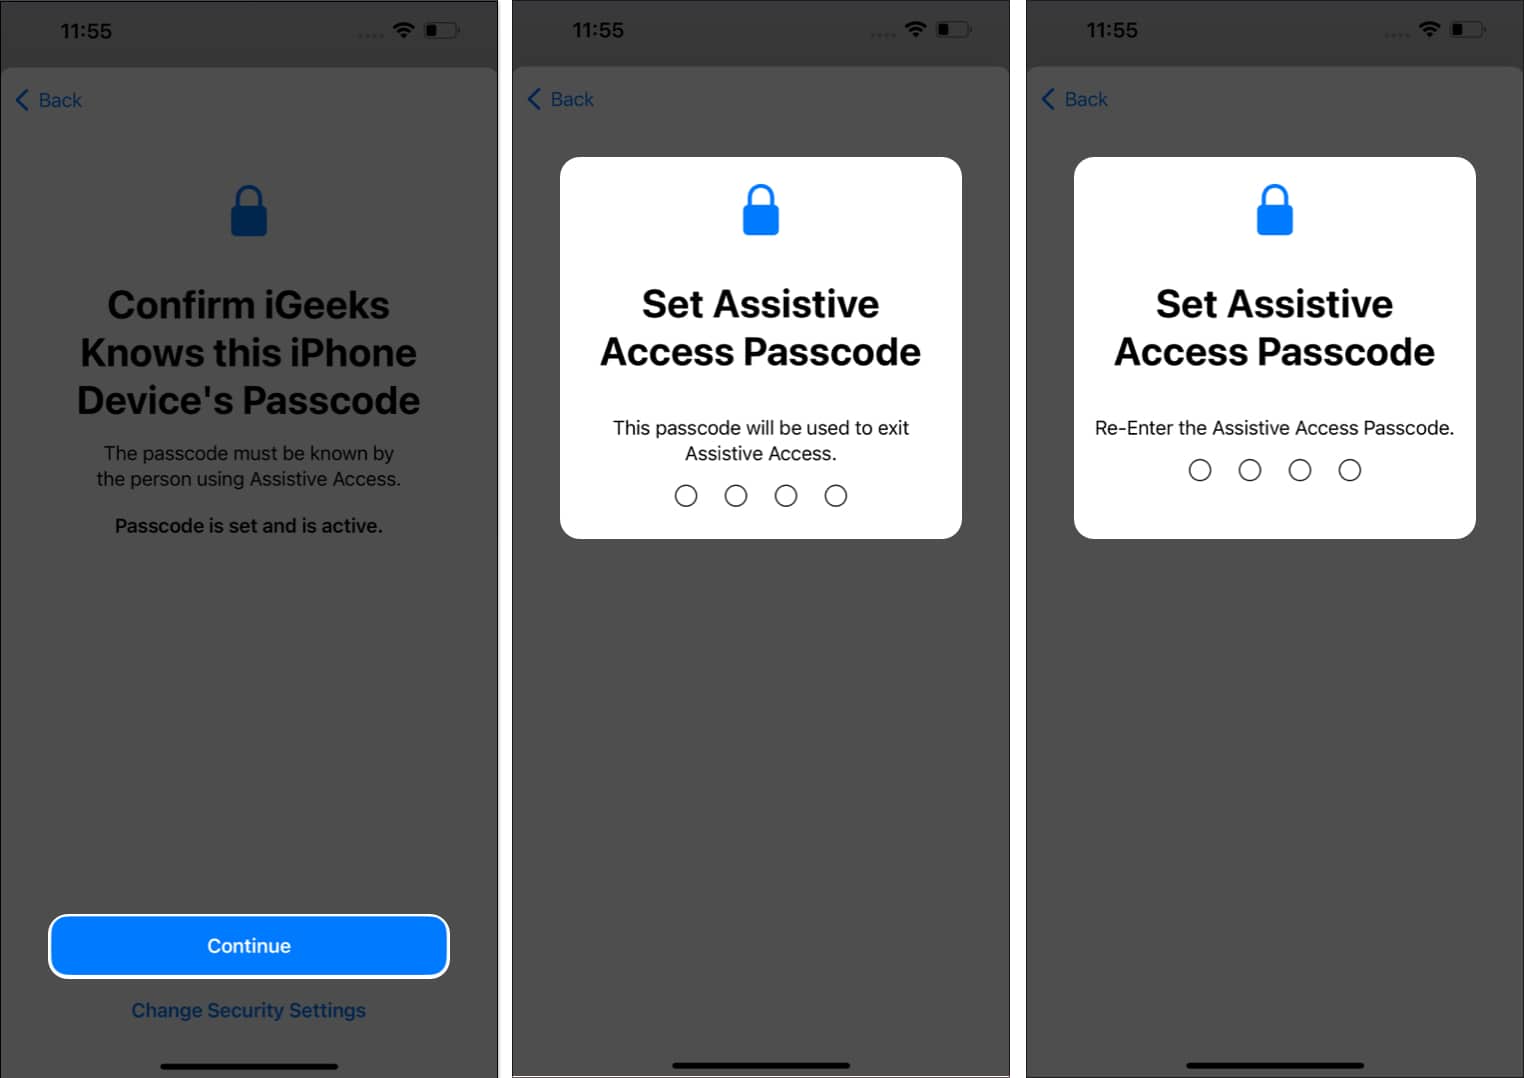
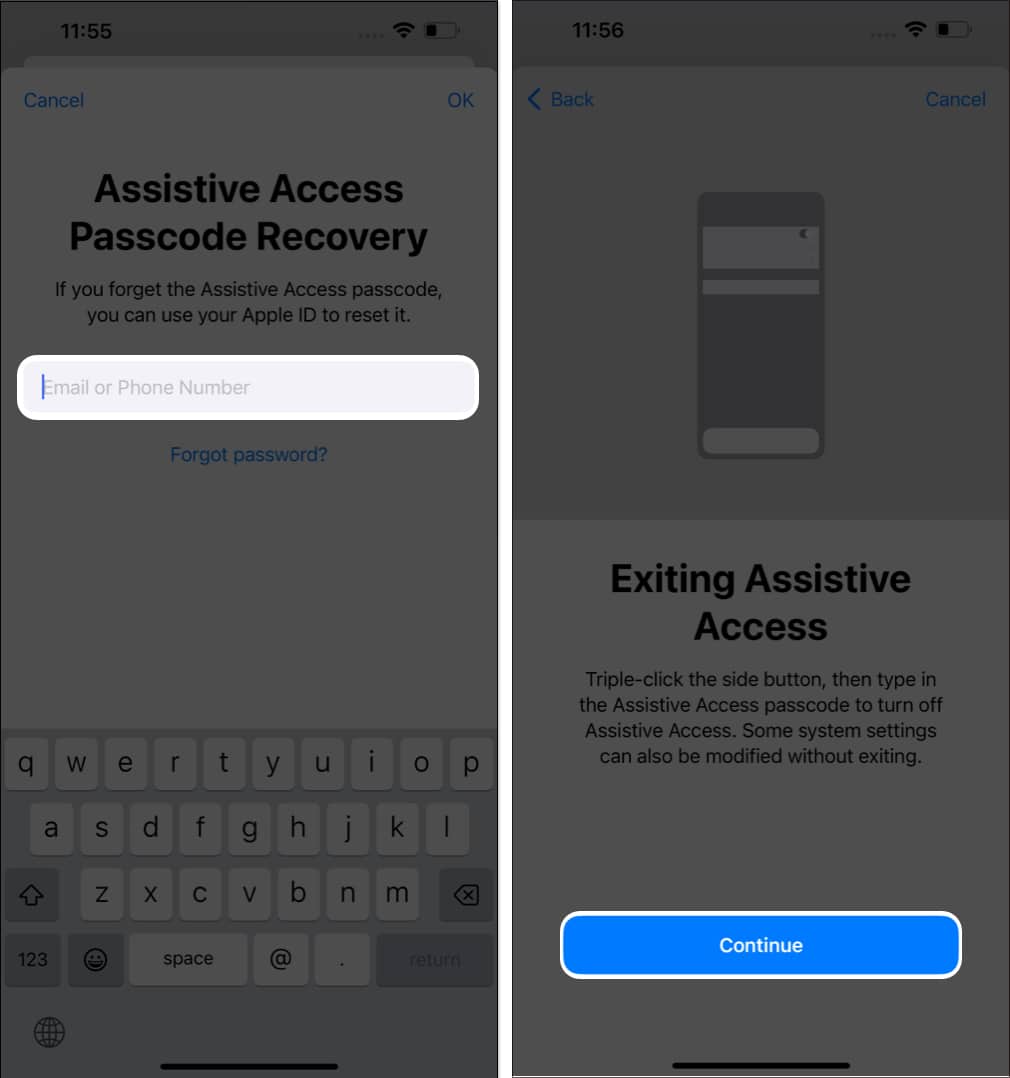
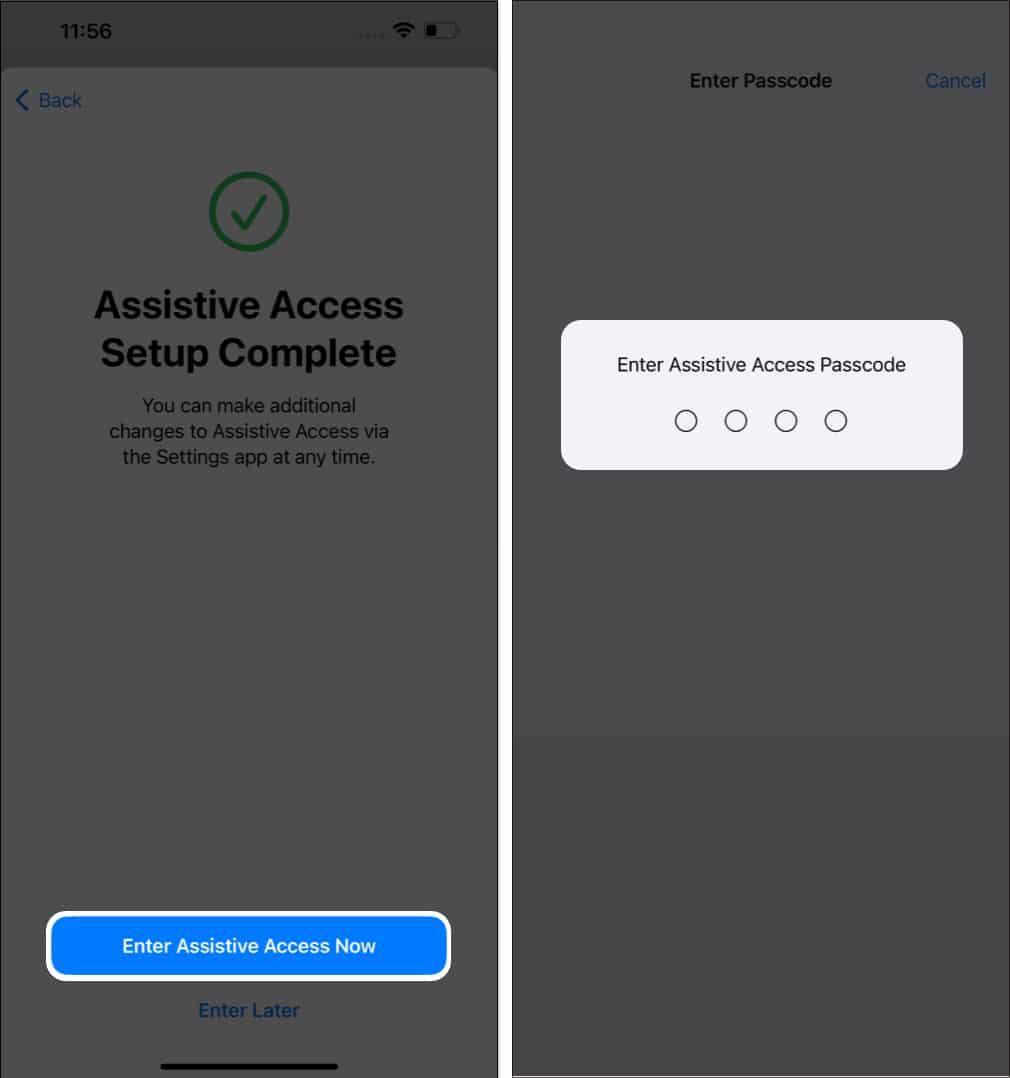
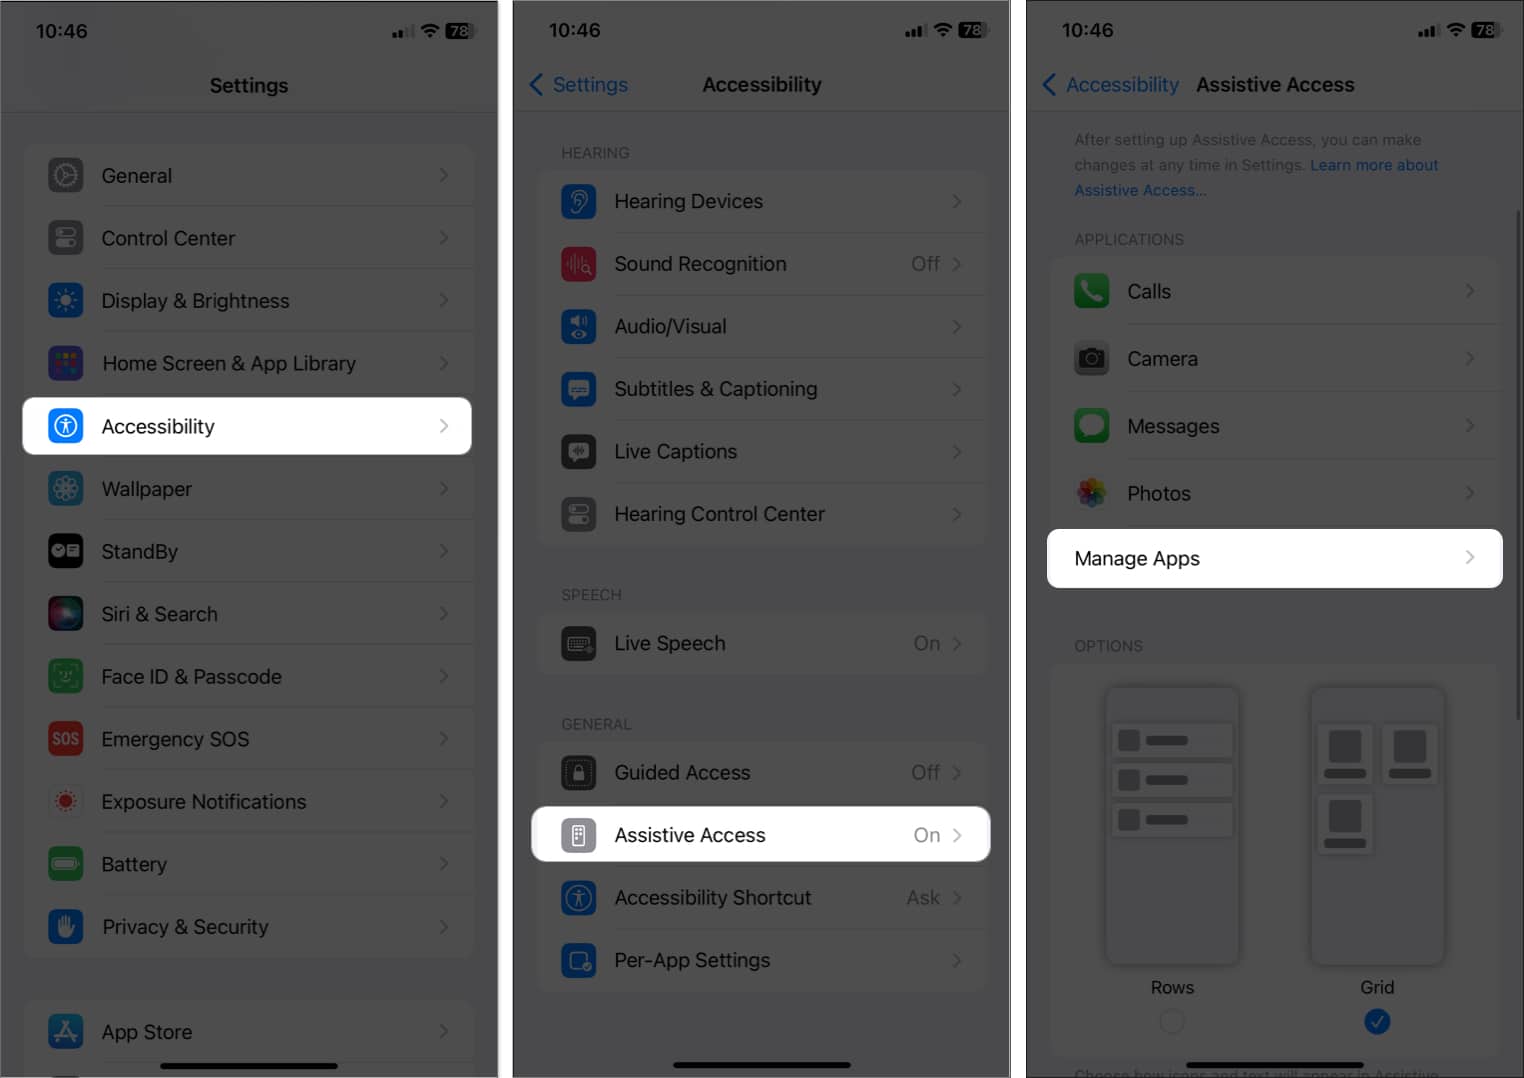
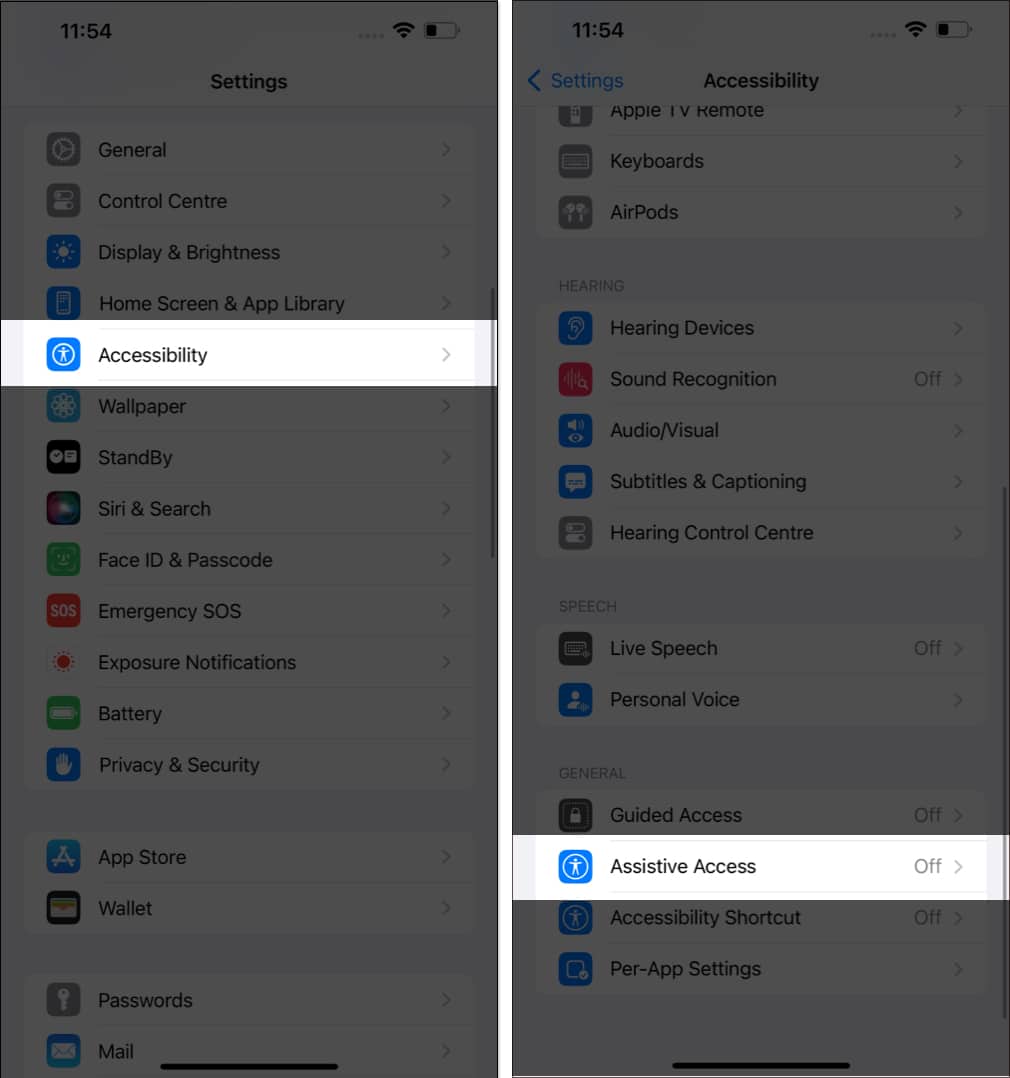
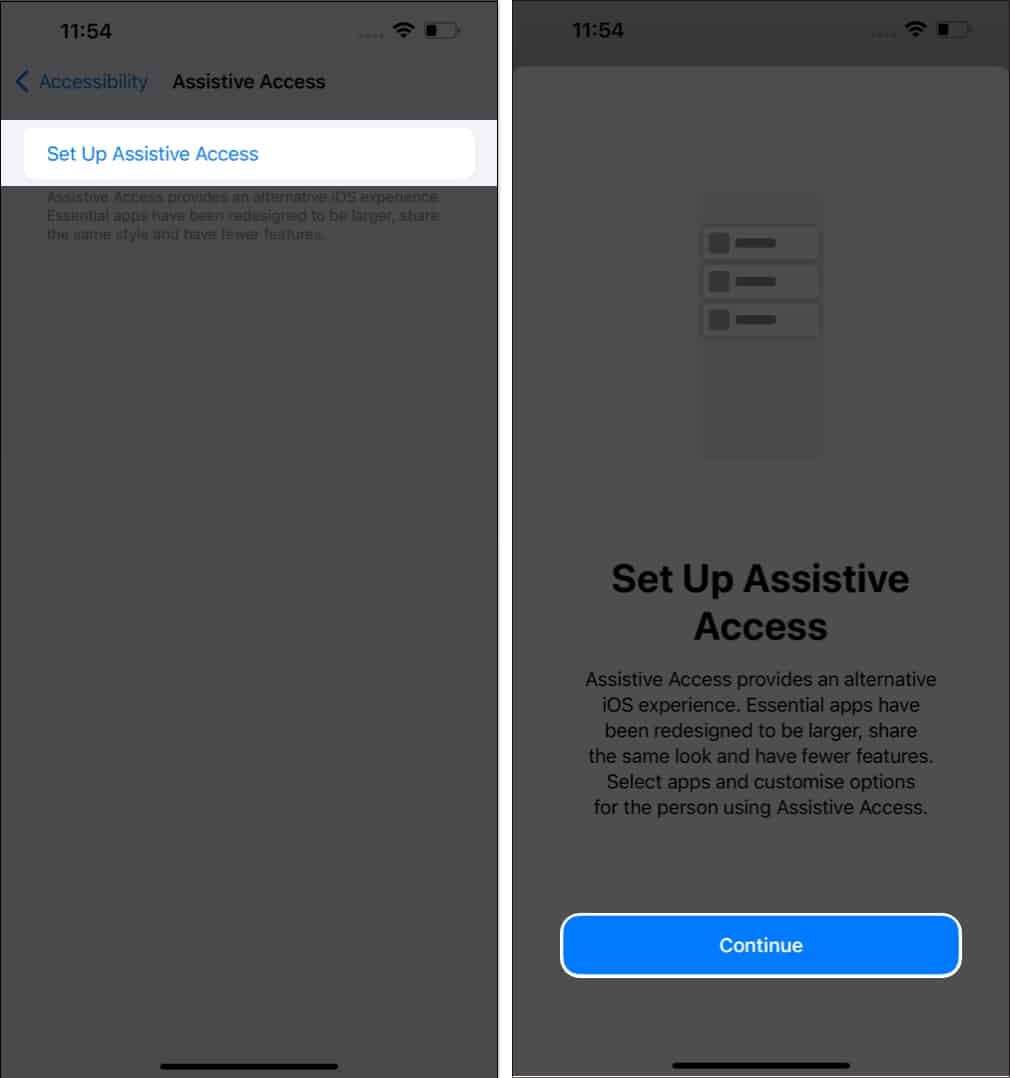
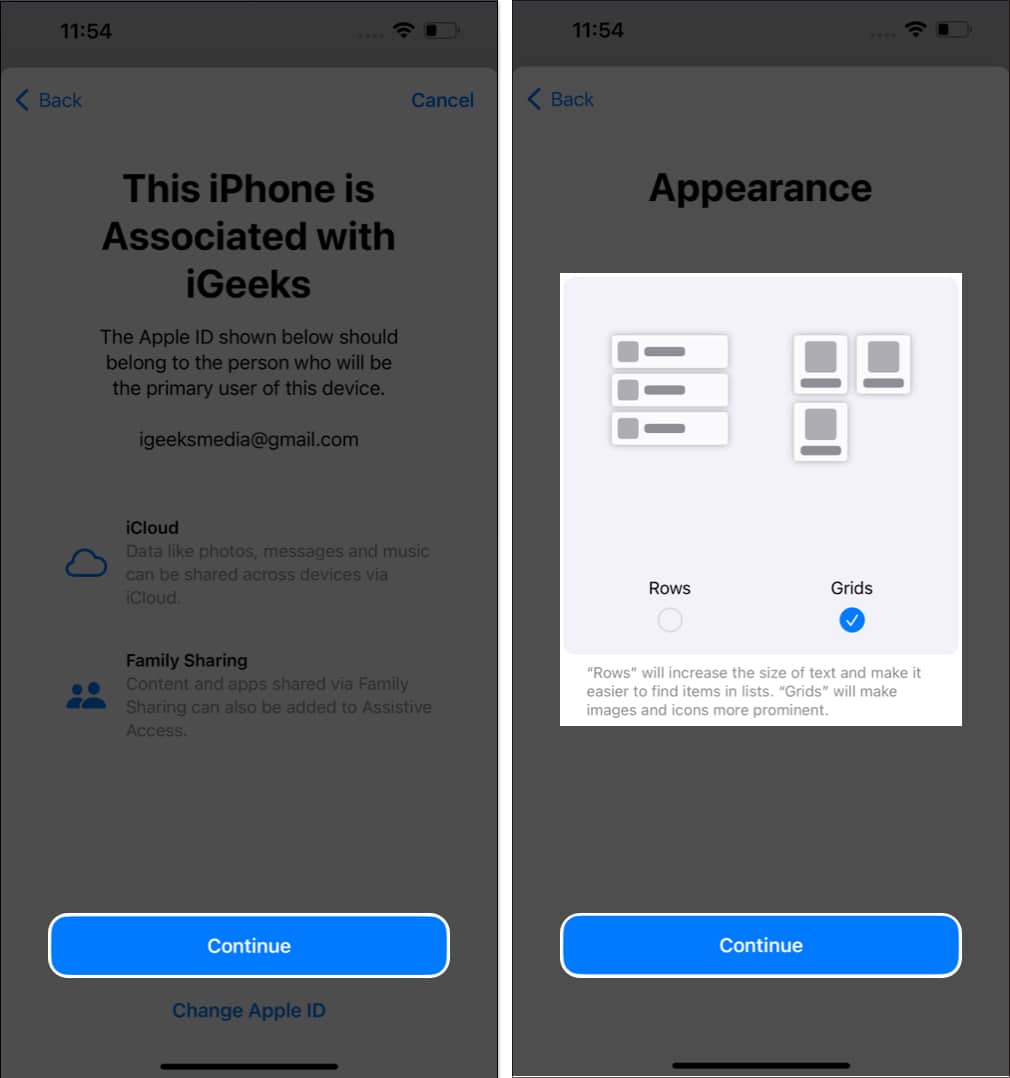
How to turn on and set up Assistive Access in iOS 17 or iPadOS 17
Now, your device will enter into Assistive Access mode after a few seconds.
How to use Assistive Access on your iPhone or iPad
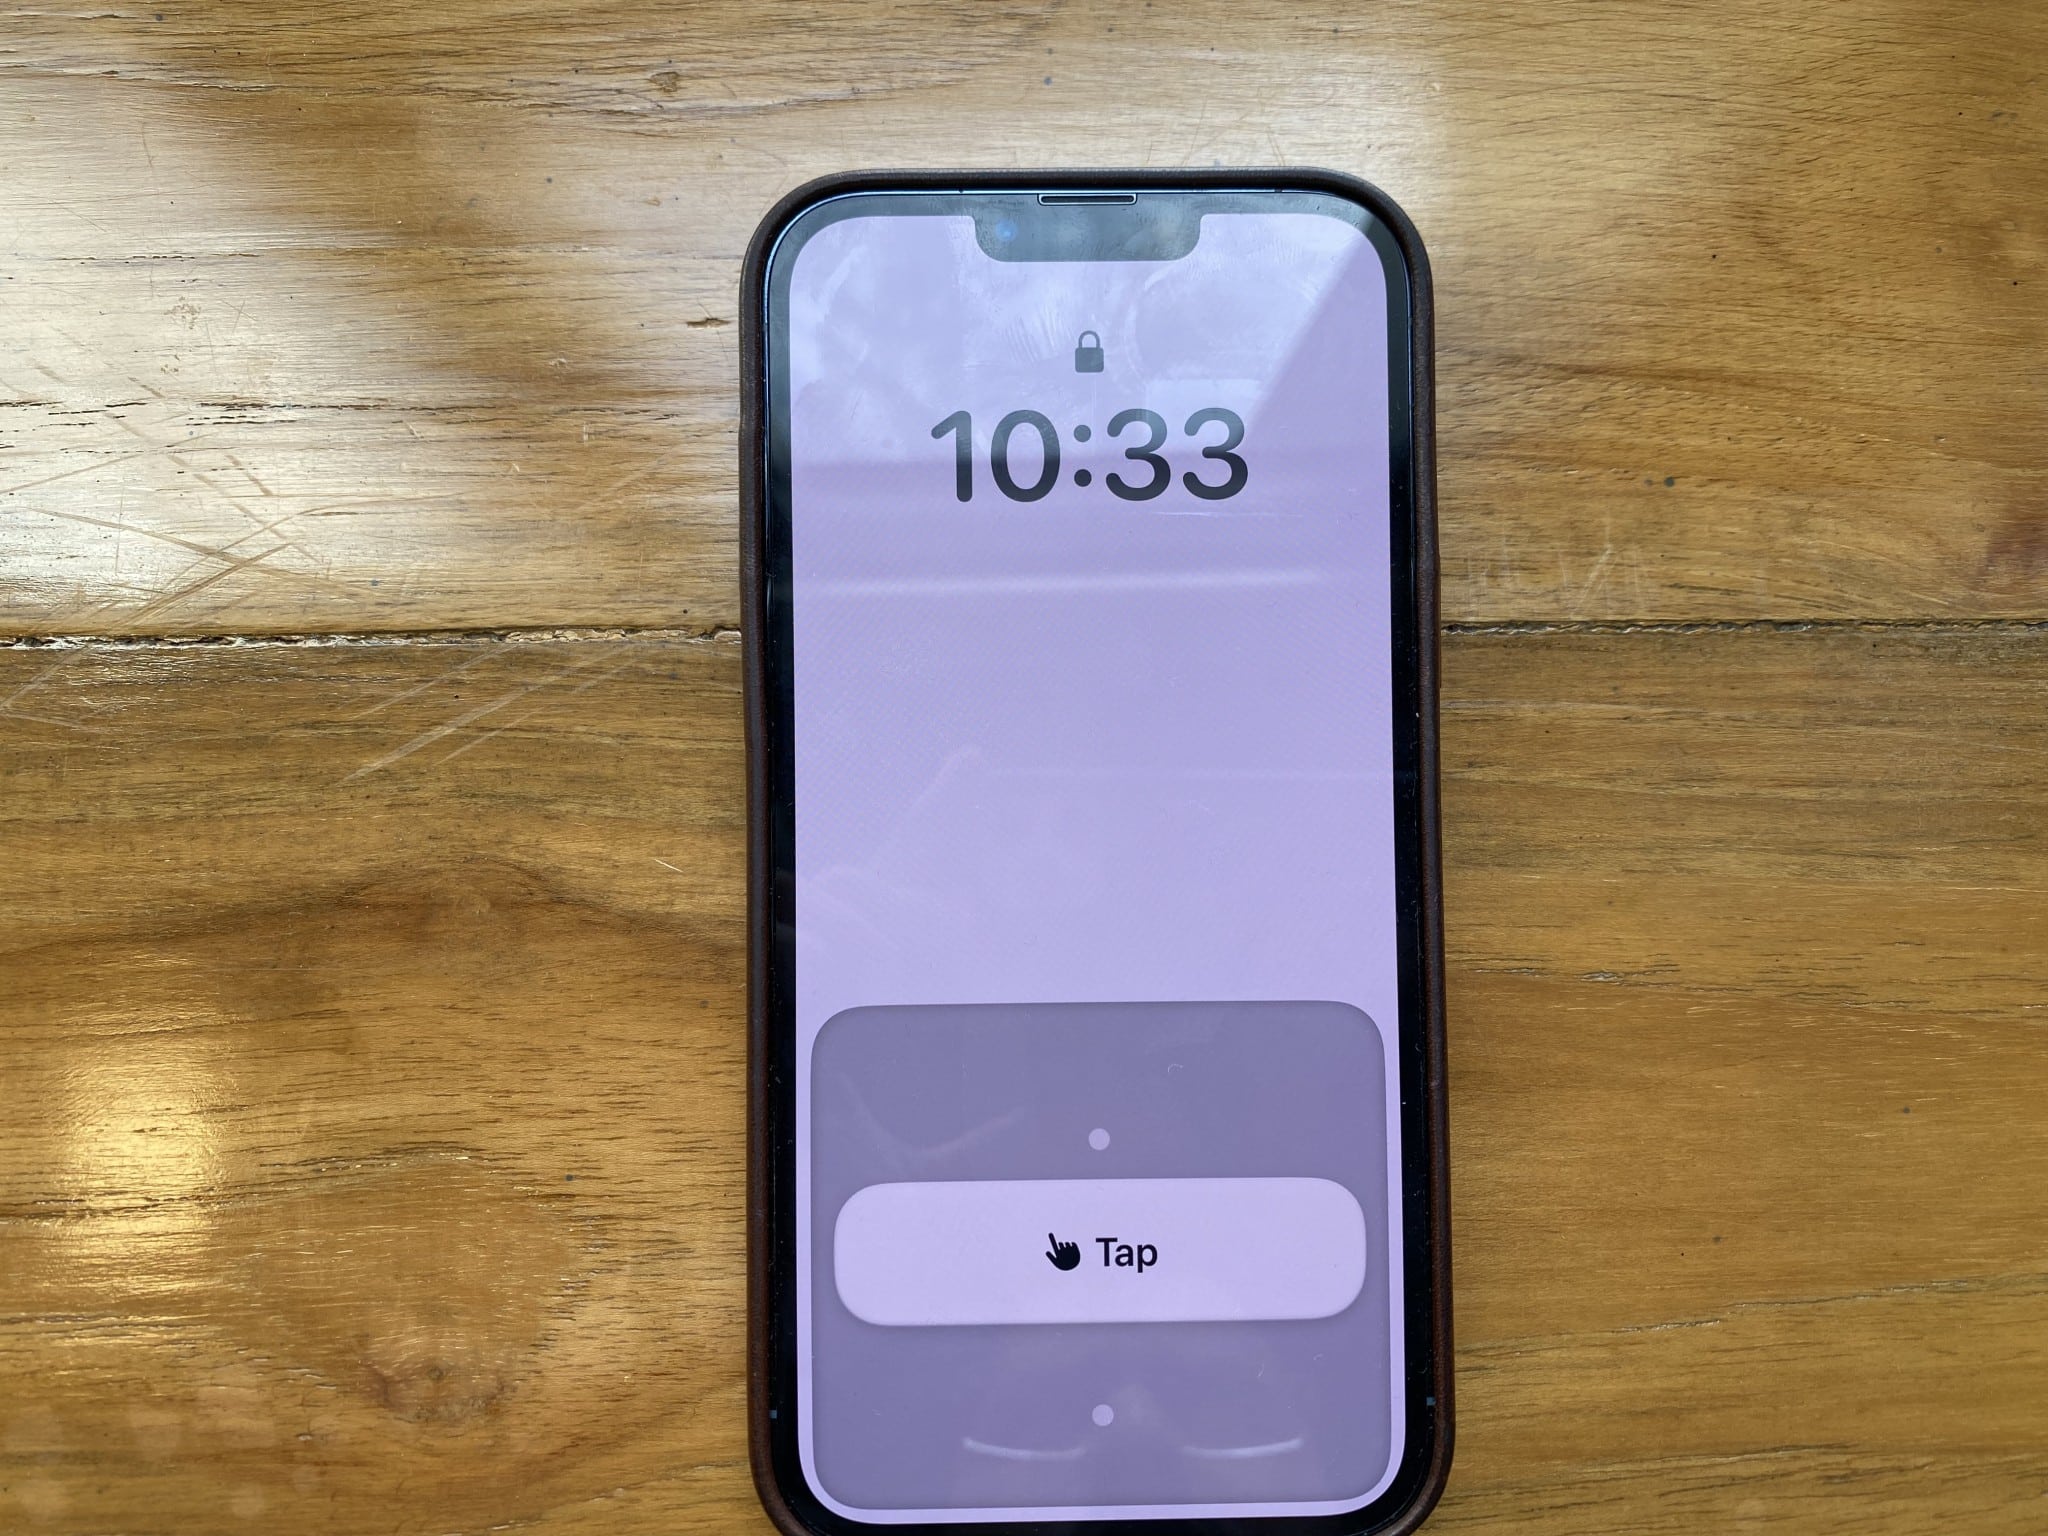
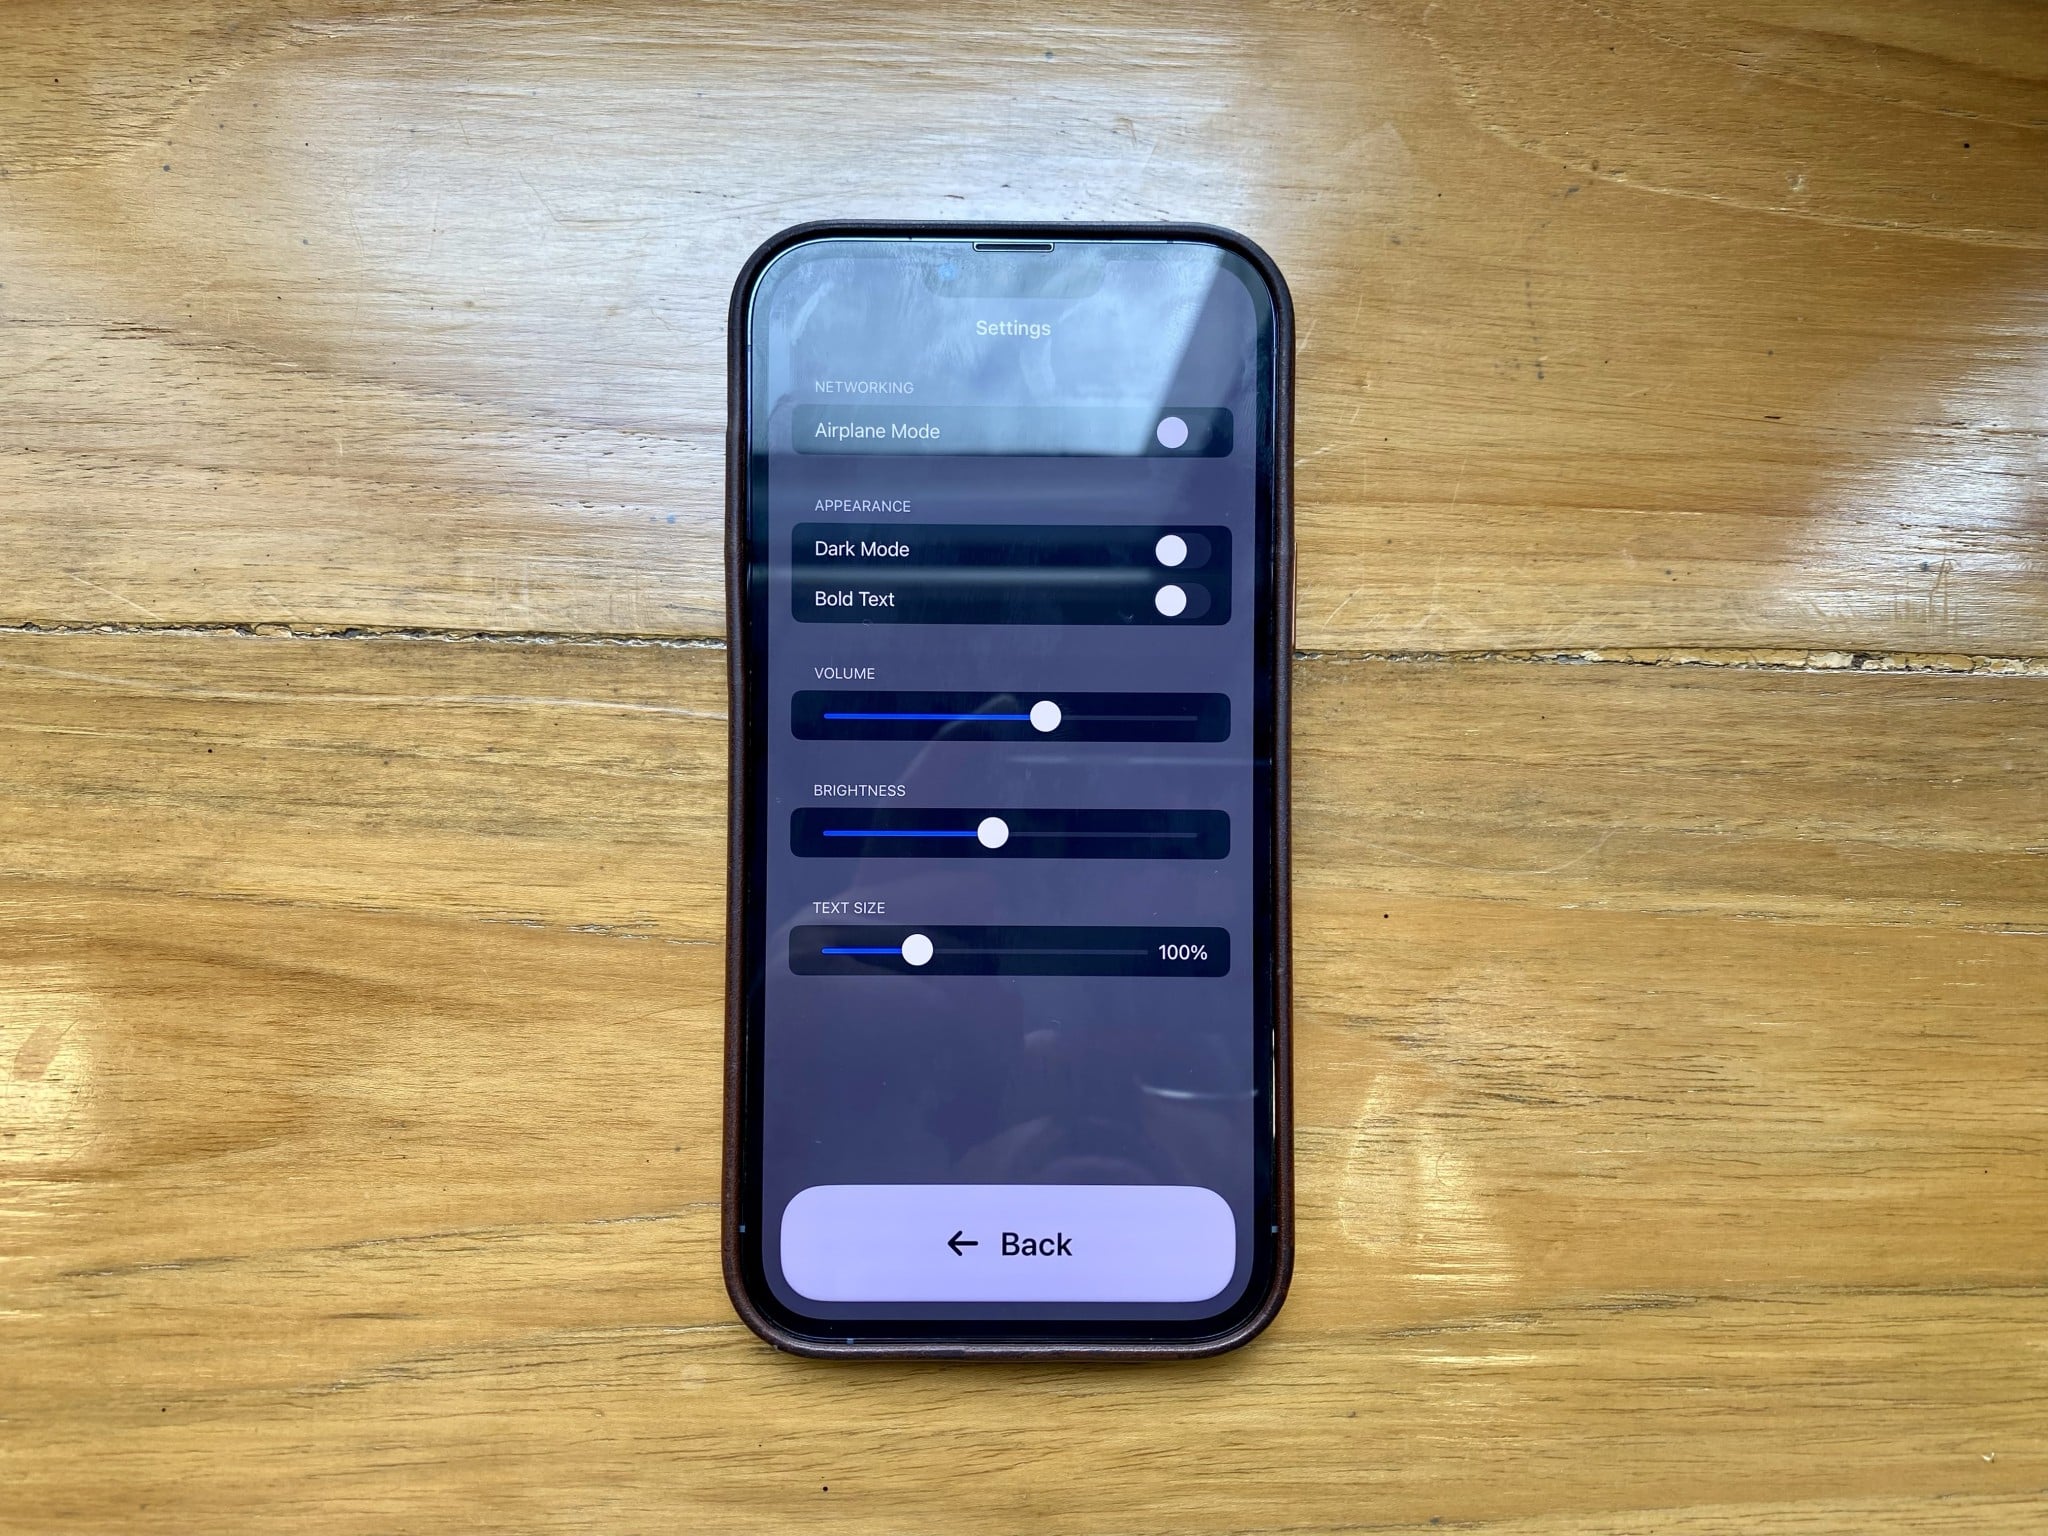
When Assistive Access is enabled, the apps you added while configuring Assistive Access will now have sizable icons on the Home Screen. Besides, the user interface will be condensed into more straightforward. There will also be simple action buttons and a large Back button.
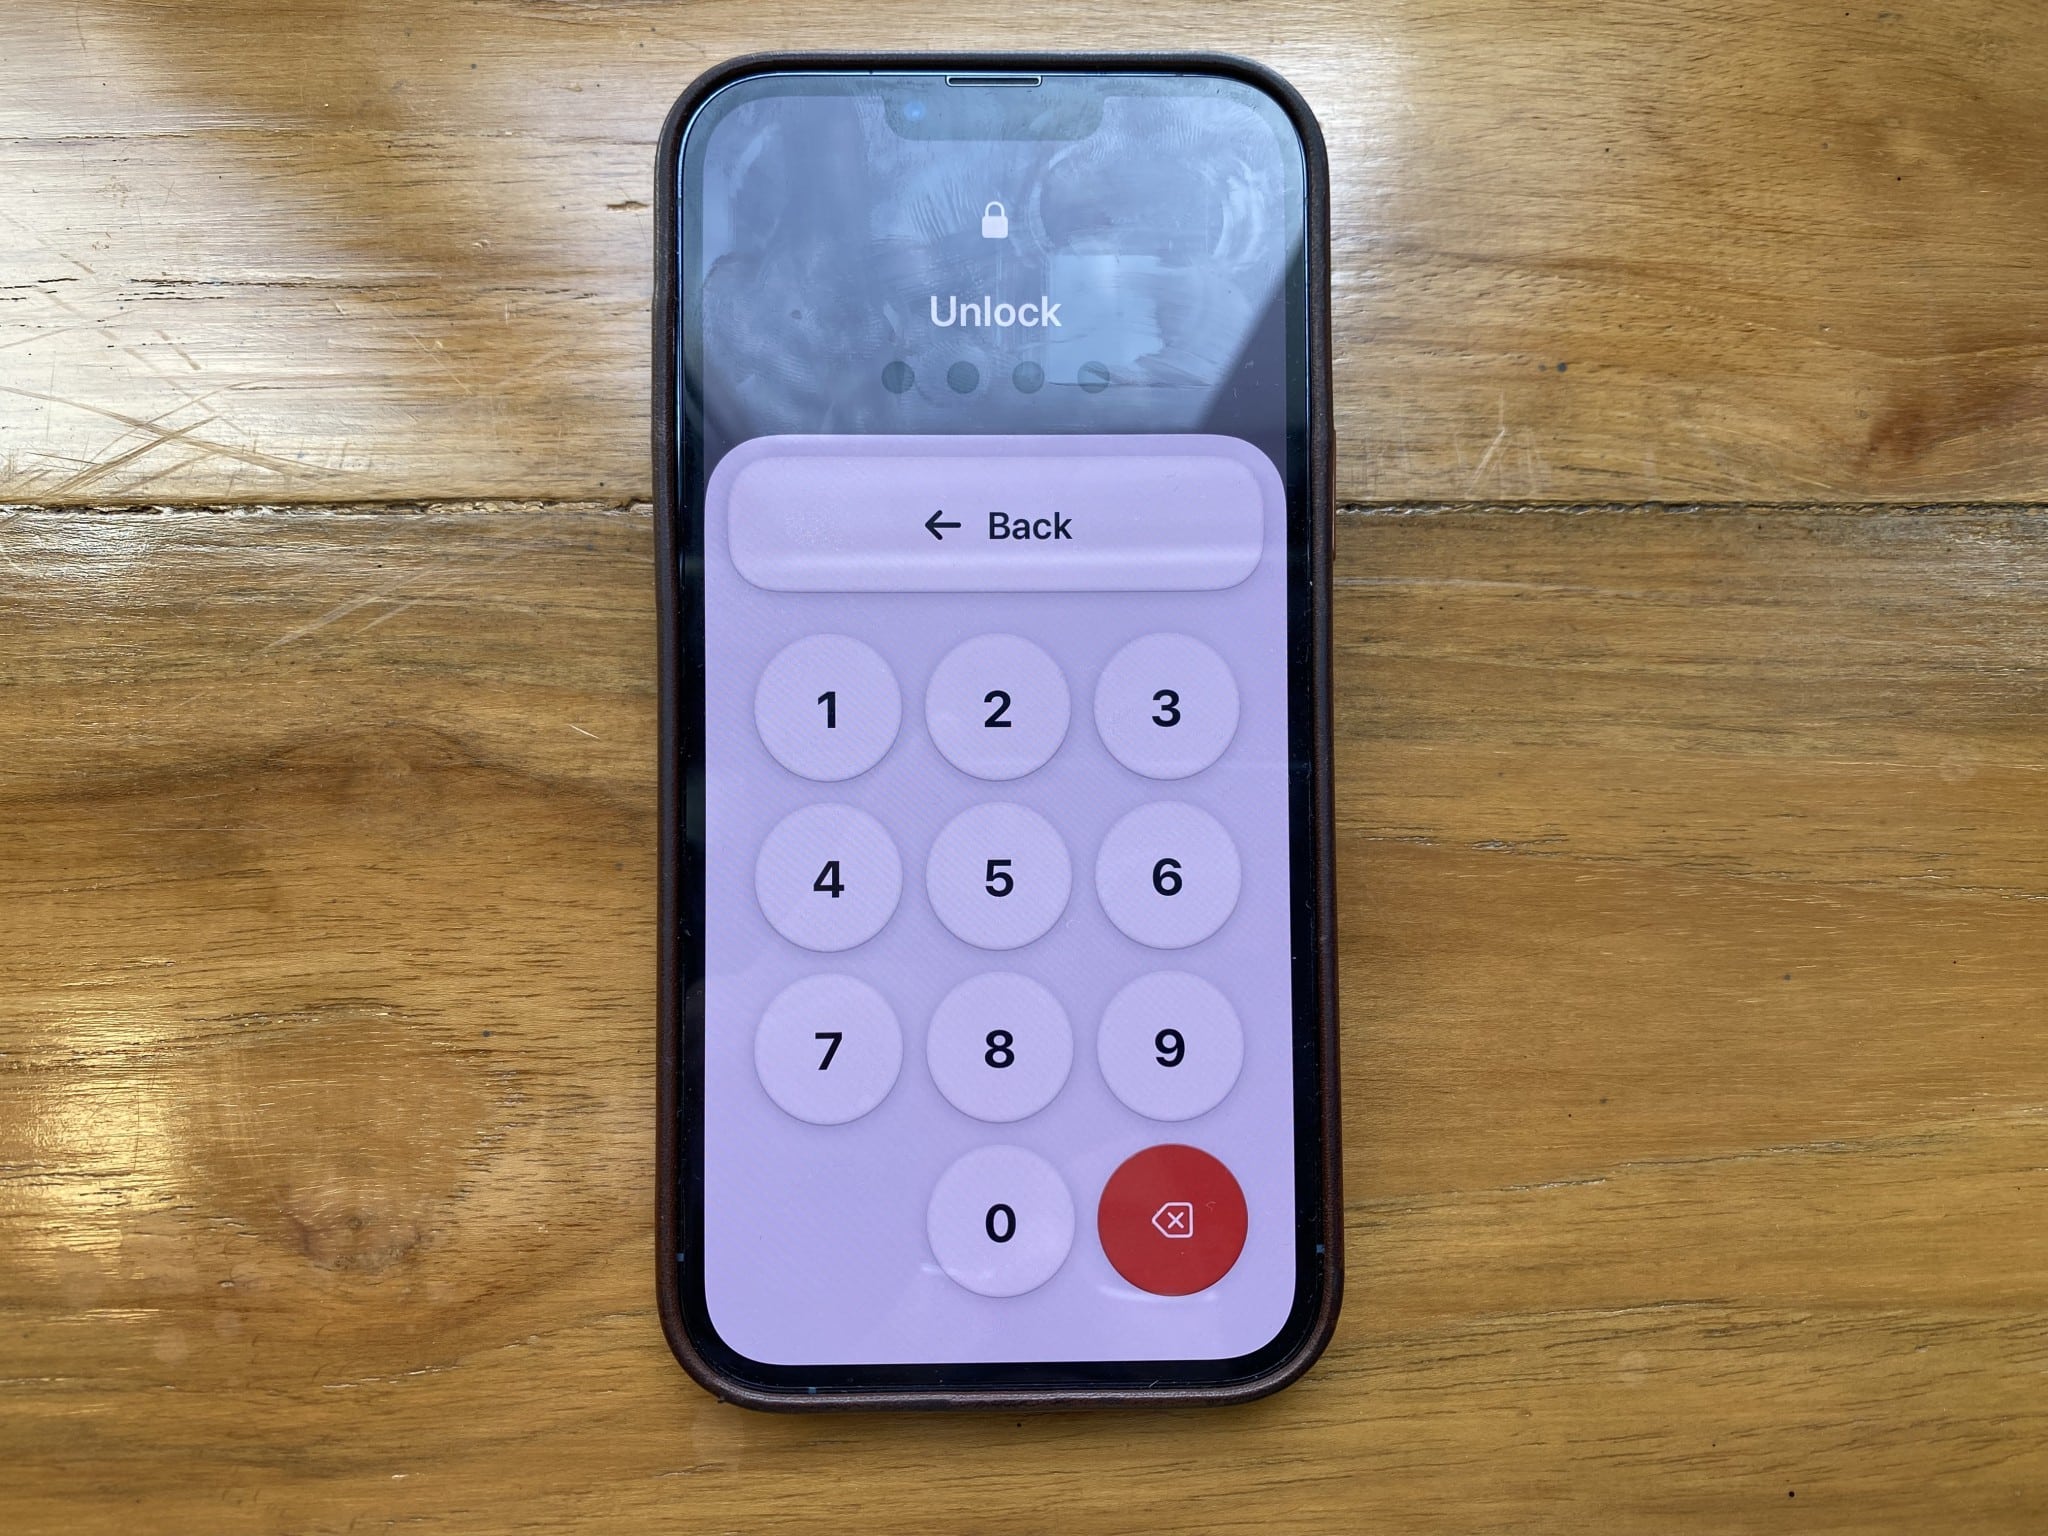
1. Unlock your iPhone or iPad
To lock your device, press the side button or the top button.
2. Use apps in Assistive Access
Simply tap the app icon to open the app. You will see a persistent Back button and a more extensive interface. For example, when I opened the Messages app with Assistive Access, the initial screen presented two columns of large contact cards. Each column featured the contact’s image and name.
3. Read new text messages
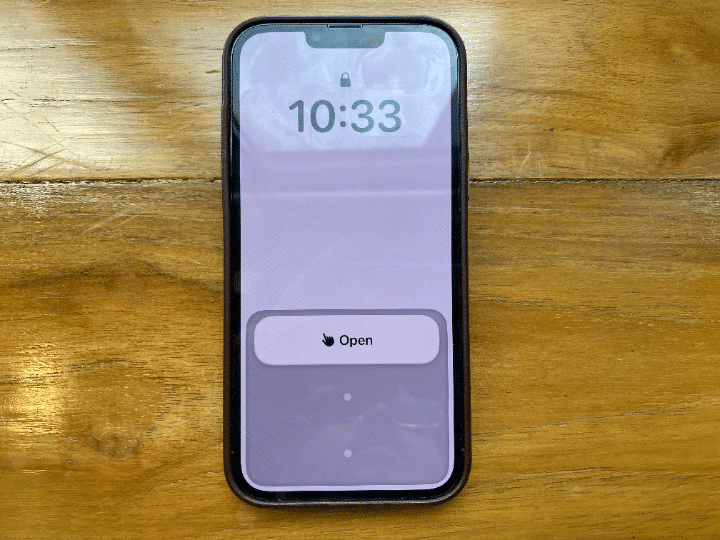
If you receive a new text message while on Assistive Access, the Messages app will show a bell icon with the New alert in the top left corner. Furthermore, if your device is locked, you will see the same icon on the top right corner of the Open button.
4. Change basic Assistive Access settings
Once you have made the desired adjustments, tap the Back button to return to the Assistive Access Home Screen.
5. Access emergency options during Assistive Access
Moreover, you can also check the health info of the user by selecting the *Medical ID in the top left corner of the screen.
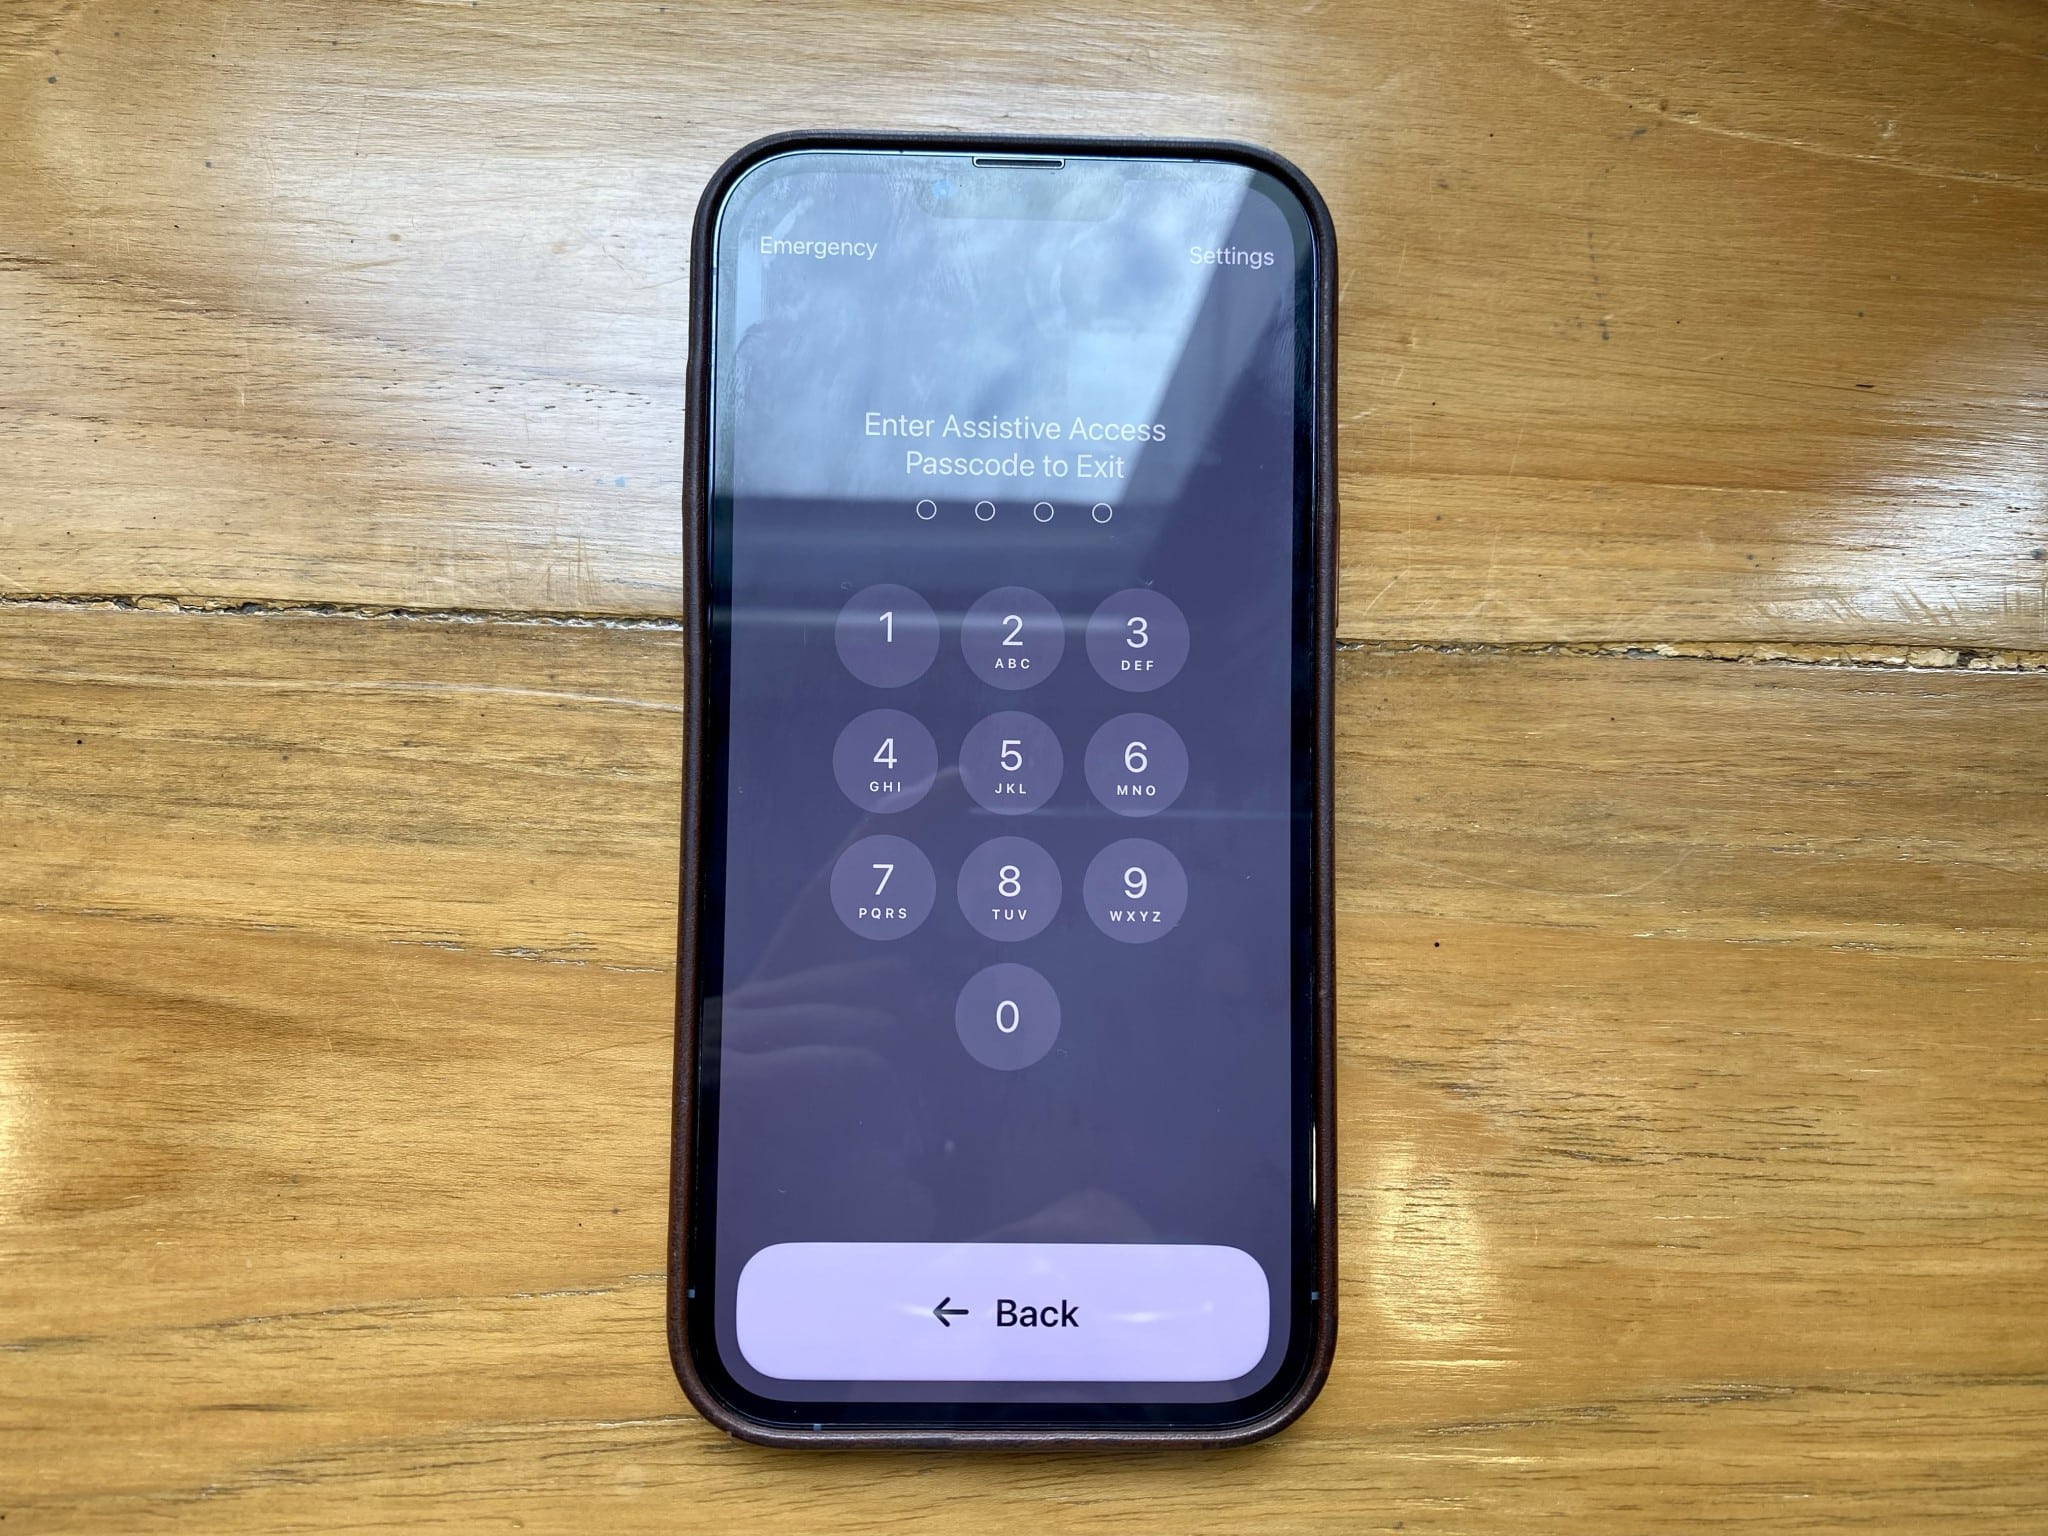
How to exit Assistive Access mode on iPhone or iPad
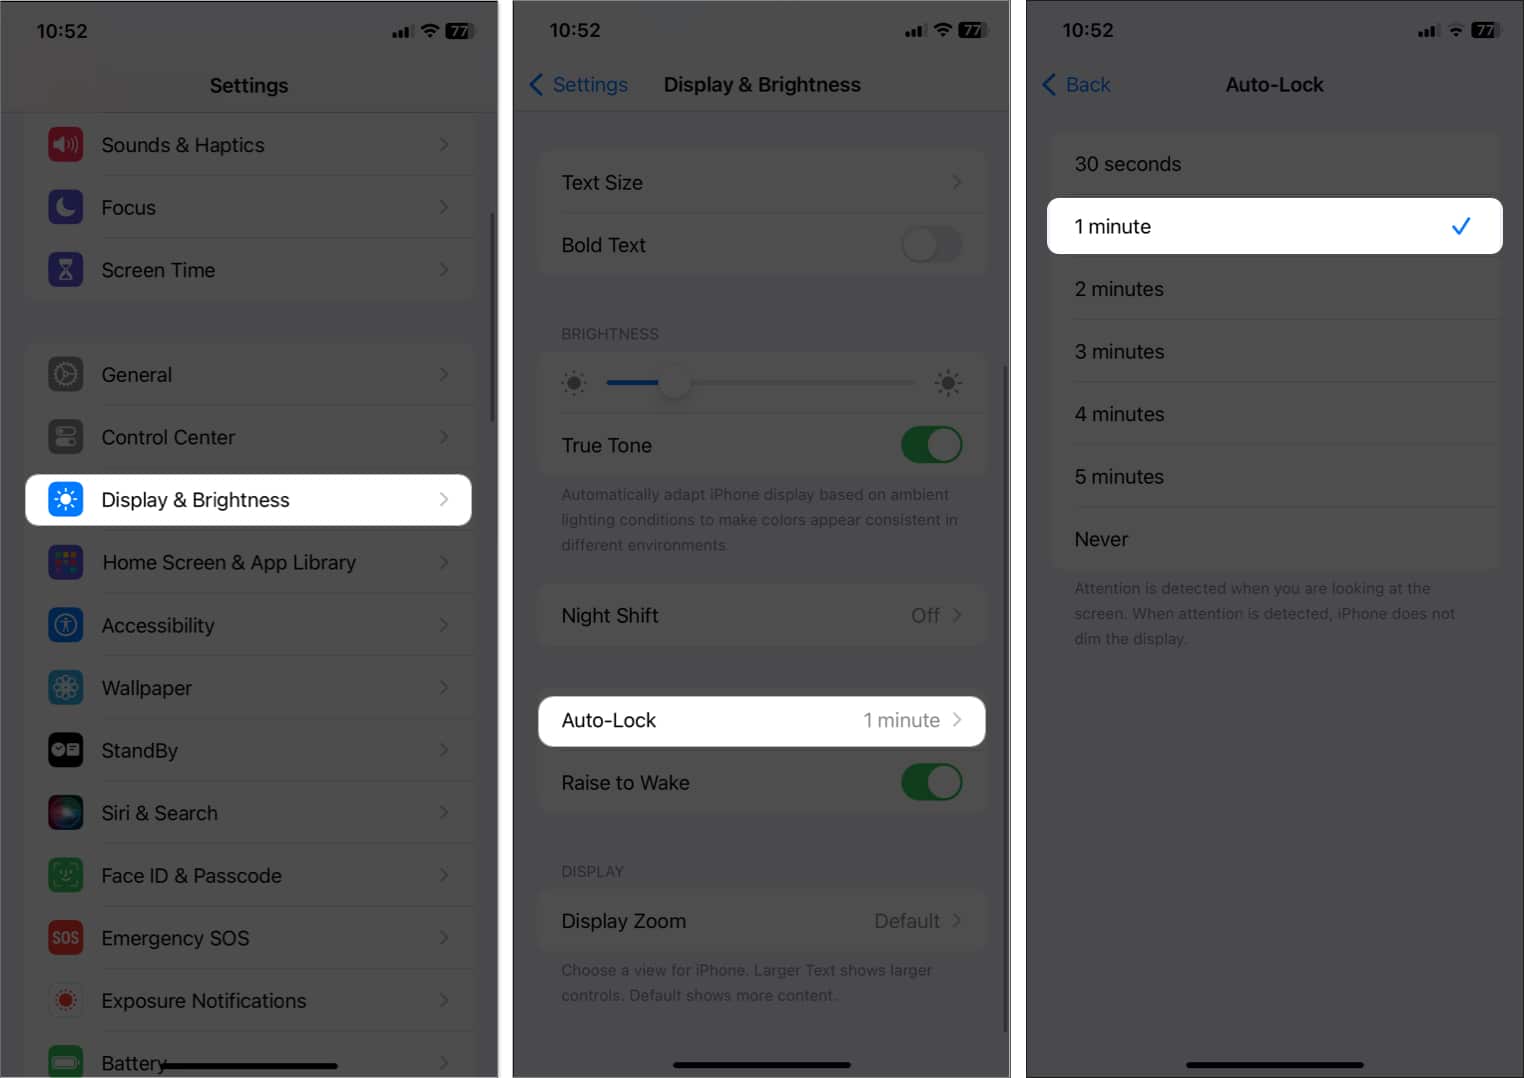
You may need to exit Assistive Access to add or remove apps, activate Siri, or change the auto-lock time. Now, wait a few minutes, and you’ll be back at your iPhone or iPad home screen.
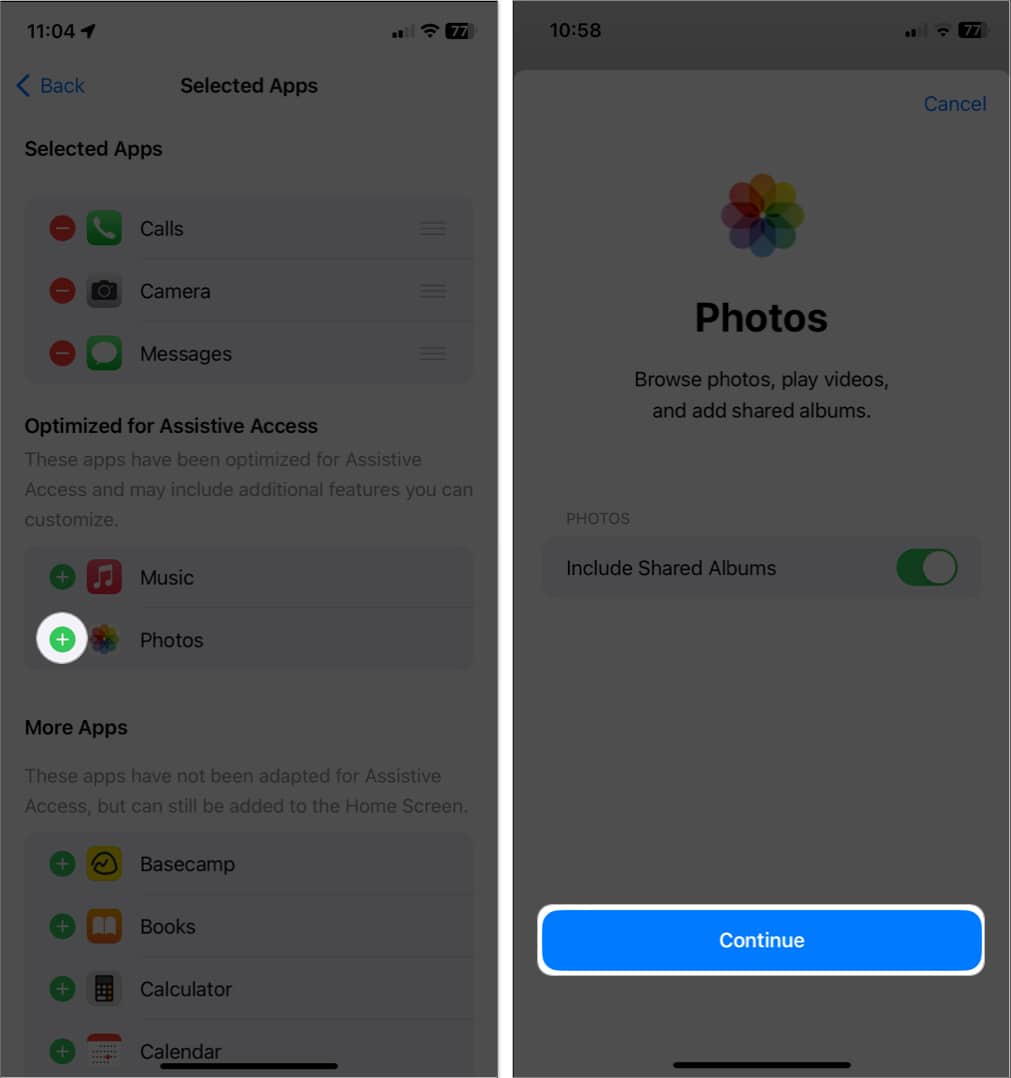
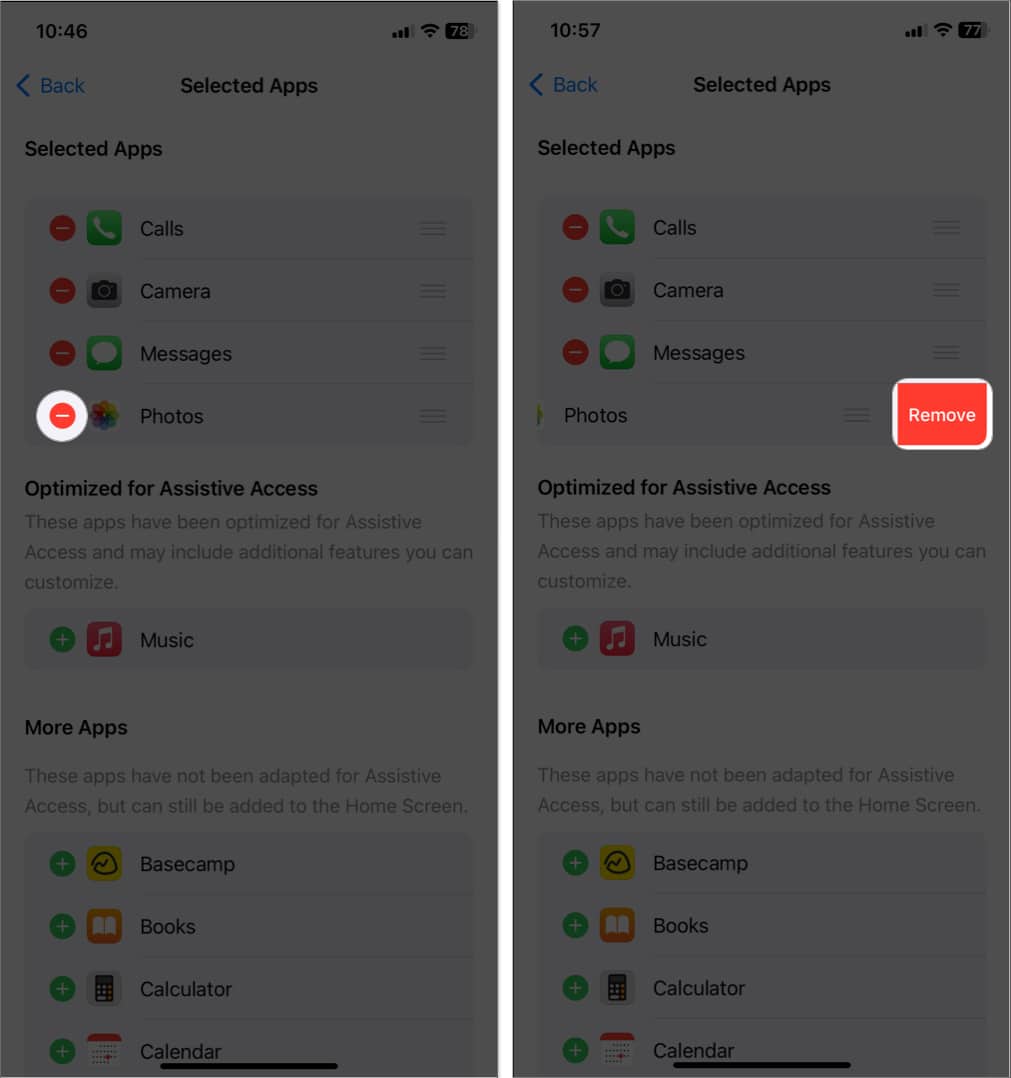
1. Add or remove apps
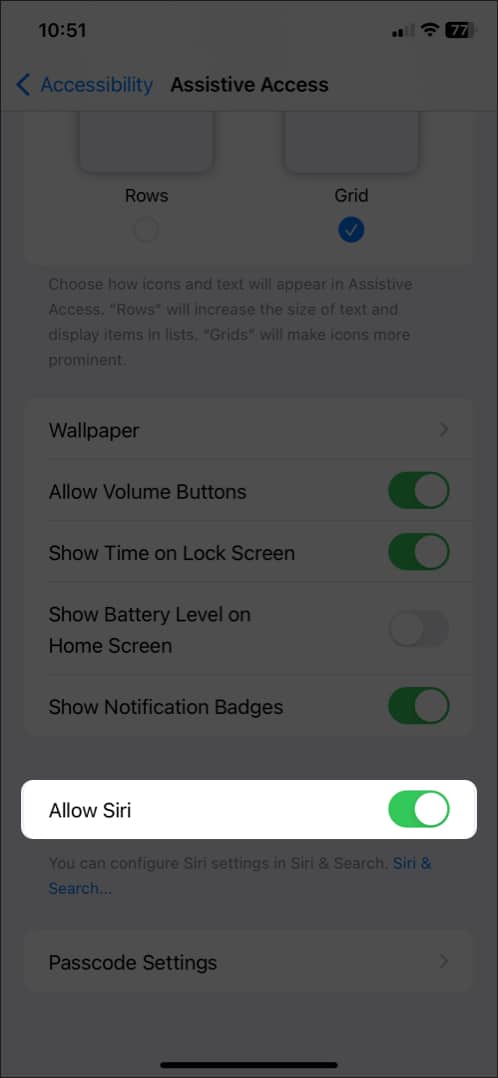
2. Enable Siri during Assistive Access
Note: You must set up Siri beforehand.
3. Change the auto-lock time of the Assistive Access screen
Wrapping up… Though Assistive Touch is an excellent feature that helps users control their devices, it has a few limitations to remember. Despite this, Assistive Touch remains a valuable tool for people with disabilities. What are your thoughts on this? Let me know in the comments. Read more:
New iOS 17 Accessibility features: Assistive Access, Personal Voice, and Live Speech Best accessibility tips for iPhone users Best text-to-speech apps for iPhone and iPad
🗣️ Our site is supported by our readers like you. When you purchase through our links, we earn a small commission. Read Disclaimer. View all posts
Δ
![]()
![]()
![]()