How To Take A Screenshot On Mac 2024 Ultimate Guide
If you’re already pretty savvy with your Mac, you’ve probably used popular shortcuts, like pressing Command (⌘) + Shift + 3 to capture the whole screen or Command (⌘) + Shift + 4 to pick a specific area. However, you can use more than just shortcuts to capture visuals on your Mac. As we have already explained, taking screenshots on your iPhone and Apple Watch can be done easily. Now, let’s look into the world of taking screenshots on Mac, starting from the basics and moving on to more advanced techniques.
Keyboard shortcuts to take screenshots on Mac
Taking screenshots on Mac is straightforward as it offers built-in keyboard shortcuts. Here’s an overview: Below, I have explained how you can optimally use the shortcuts mentioned above.
How to take a screenshot of the entire screen on Mac
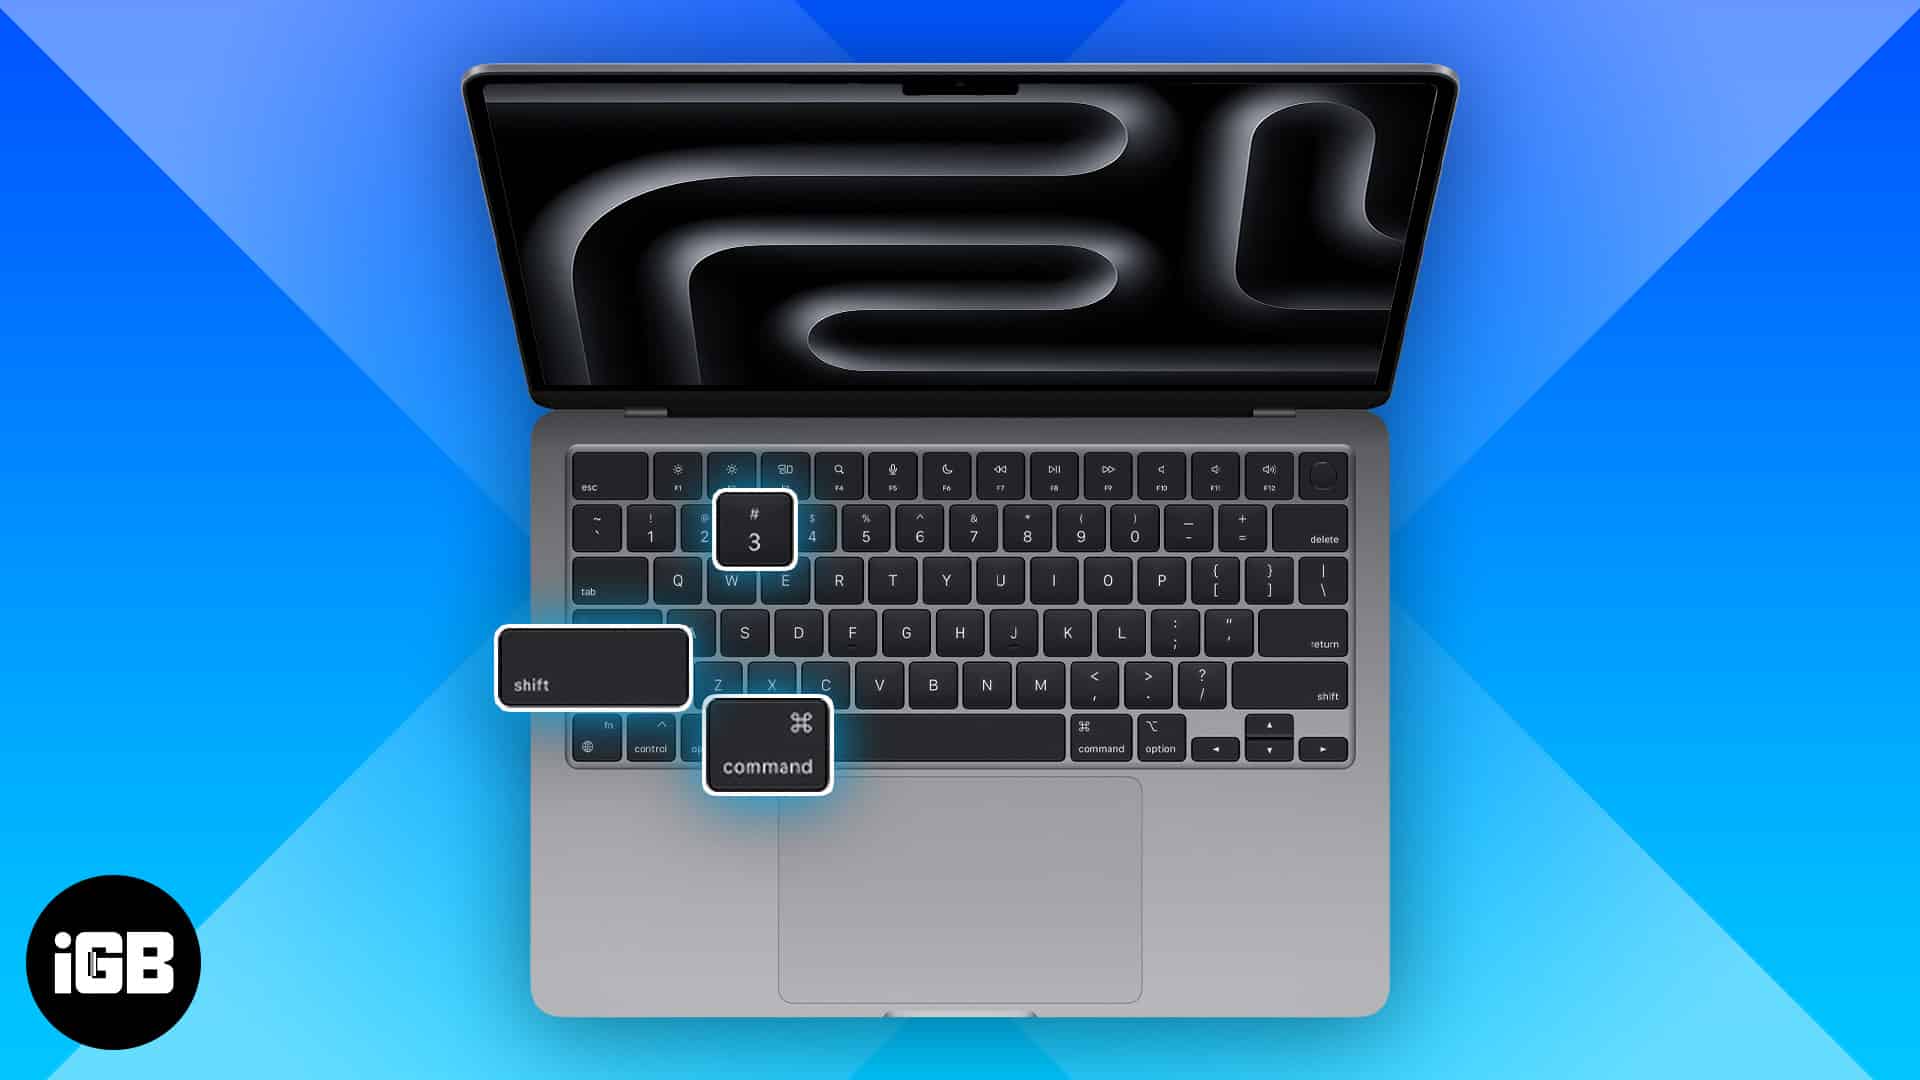
To take a screenshot of the full Mac screen, including the Dock, top menu bar, and everything else, use Command + Shift + 3. Performing this action will instantly take a screenshot, and you’ll see a thumbnail of your screenshot at the bottom right of your screen. You can click that small window to view the screenshot you have just taken.
How to take a screenshot of a portion of your Mac screen
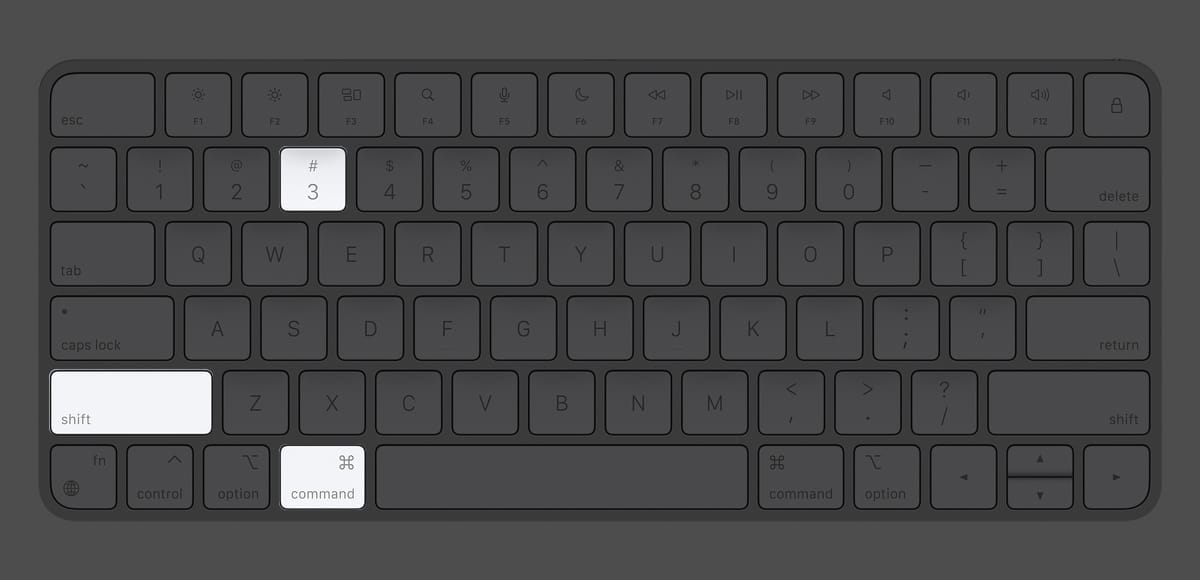
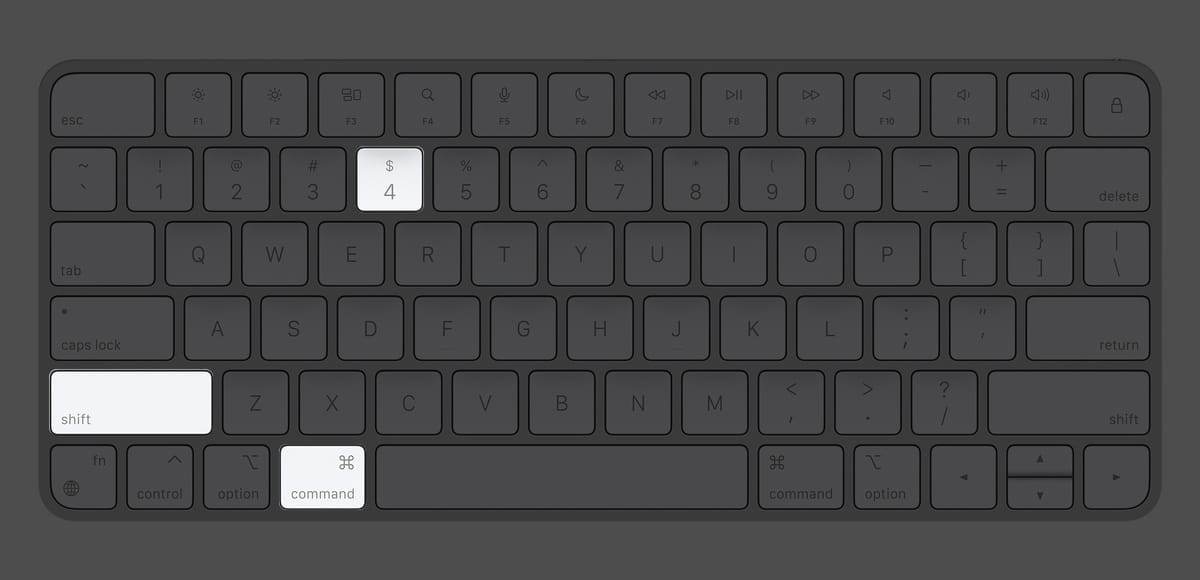
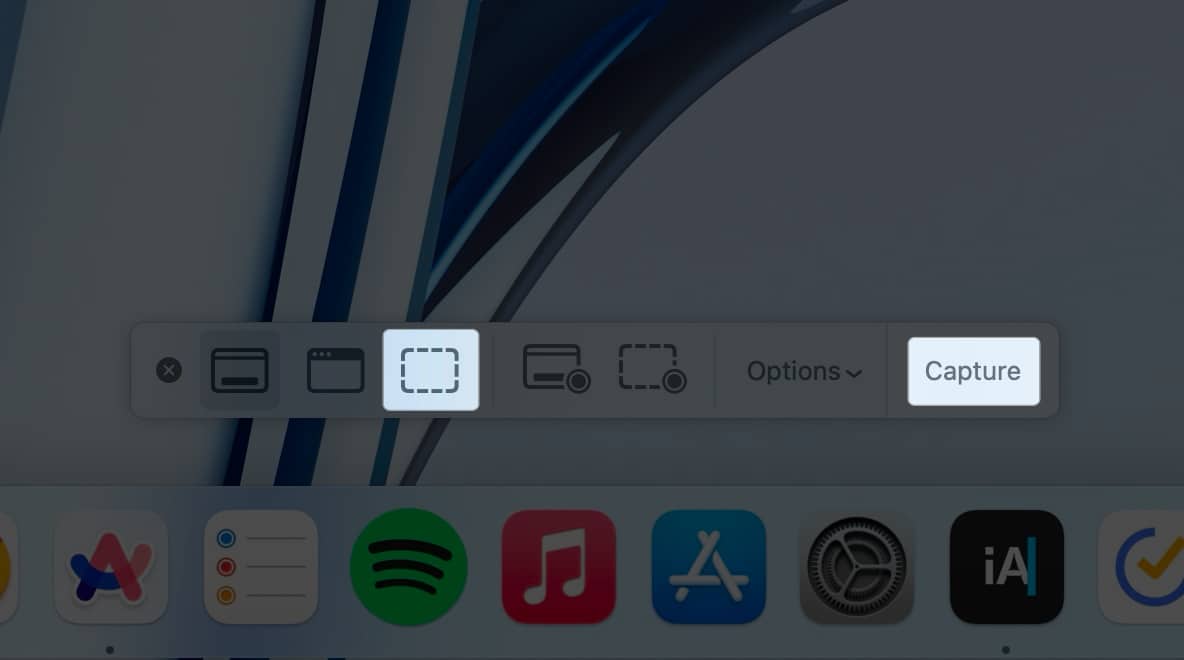
To take a screenshot of a selected portion, press together Command + Shift + 4. You may leave the keys when you see the crosshair (+). Next, drag it to select a portion of the screen. When you are done with the selection, release the mouse key or trackpad touch. The Mac captures a screenshot and saves it.
How to take a screenshot of a Mac window
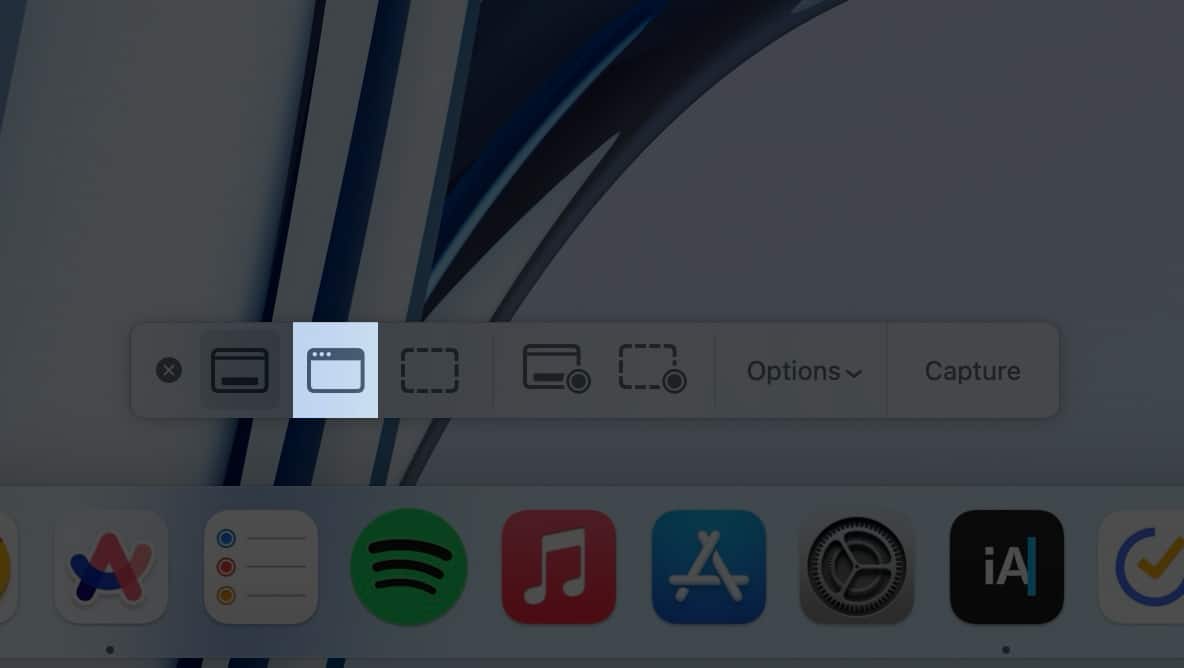
To capture only an open window on Mac, press together Command + Shift + 4. Leave the keys when you get the selection cursor. Now, press the Space bar once. Next, take the camera icon on any open window and click. Using this, you can even do a screenshot of just the Dock or the menu bar and so on. These screenshot files have a nice grey shading on their edges that looks great. As mentioned earlier, after you take a screenshot using any method, you might see its thumbnail in the lower right corner. It will automatically disappear after a few seconds and get saved. Or you may also click it to make edits like crop, markup, share, etc.
How to access and use Screenshot toolbar on Mac
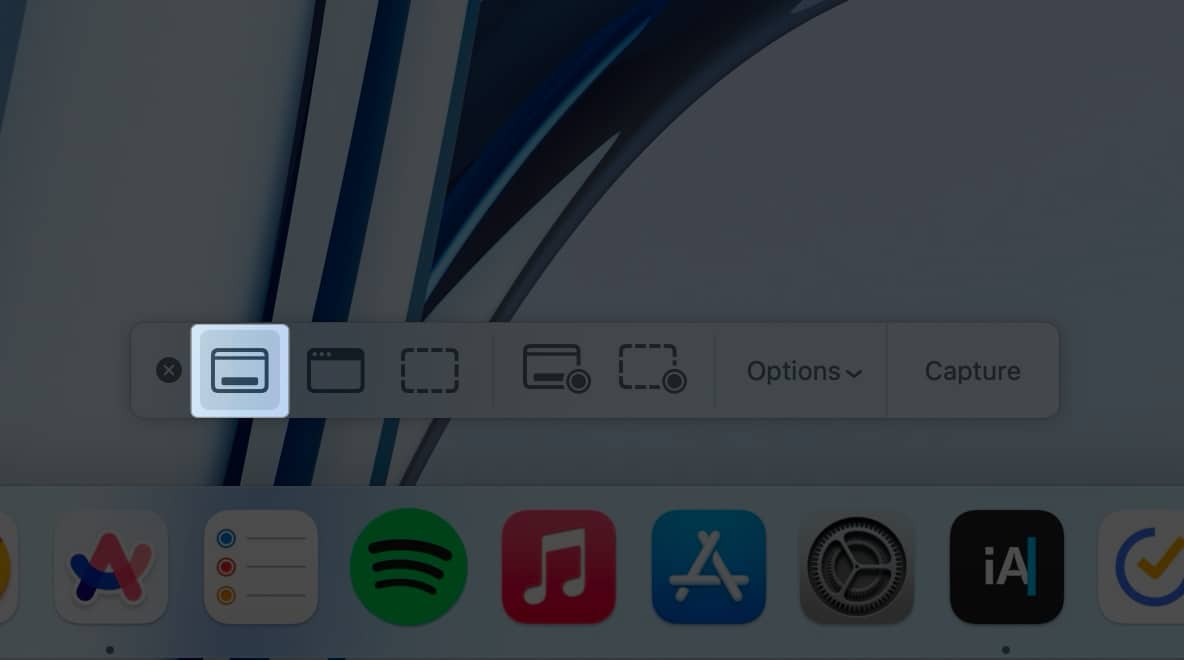
Can not remember all the above keys? Then, you may pull up the Screenshot app using Spotlight Search. Press Command + Spacebar → Type Screenshot in the search bar and hit return. Otherwise, you may remember just one combination. Then, you can use the tools you see to take a screenshot or even screen record your Mac. For this, press together Command + Shift + 5. Both these options will present you with a selection window and a toolbar with options below it. Keep reading to learn how you can make the most of it.
Take screenshots using toolbar options
Open the Screenshot app using any of the two methods discussed above.
To capture full-screen: Select Capture Entire Screen → Left-click to capture. To take cropped screenshots: Choose Capture Selected Portion → Drag corners to select a portion → Click the window and drag to adjust the position → Hit Capture. To capture a specific window or menu: Select the Capture Selected Window option → Go to the window you want to take a screenshot → Just left-click. To record Mac screen: To the right of these three screenshot options, you’ll see two buttons for screen recording. The first option lets you screen record the whole Mac window, while the second option lets you record a selected portion of your Mac screen.
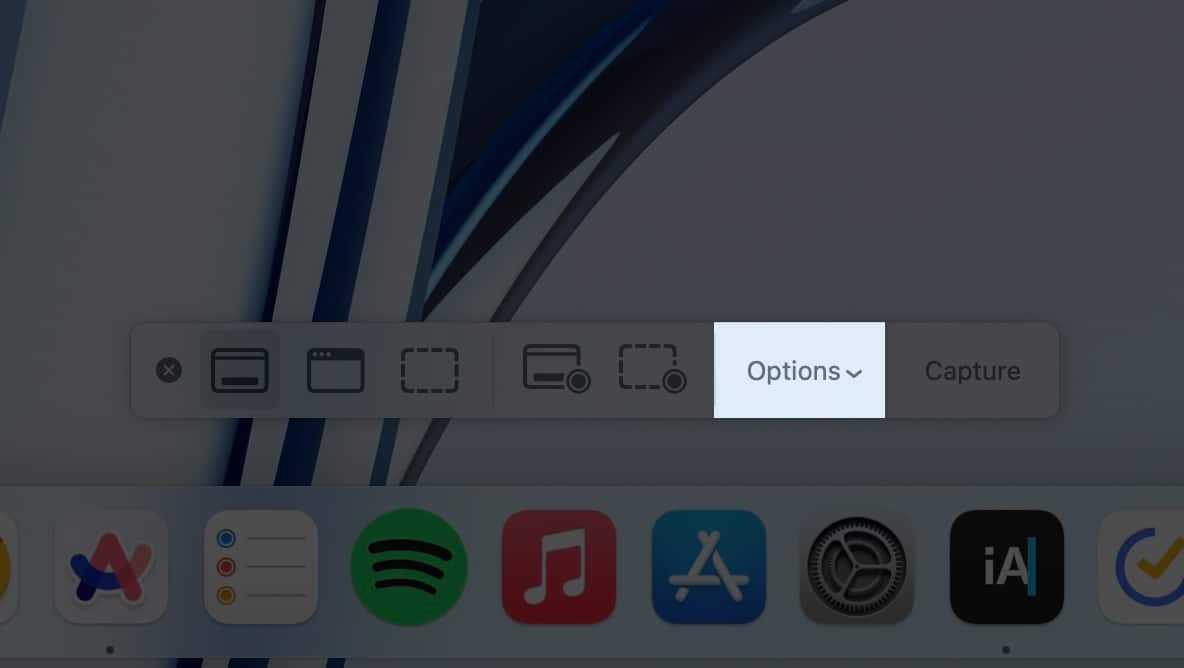
Further, you may also click the Options menu to change the screenshot location, add a timer, and access other customizations.
How to take screenshots without using Mac keyboard
If you find remembering all the keyboard shortcuts difficult or don’t have access to your keyboard, worry not! Below are the steps to capture Mac screenshots without keyboard shortcuts.
Method 1: Using Screenshot tool
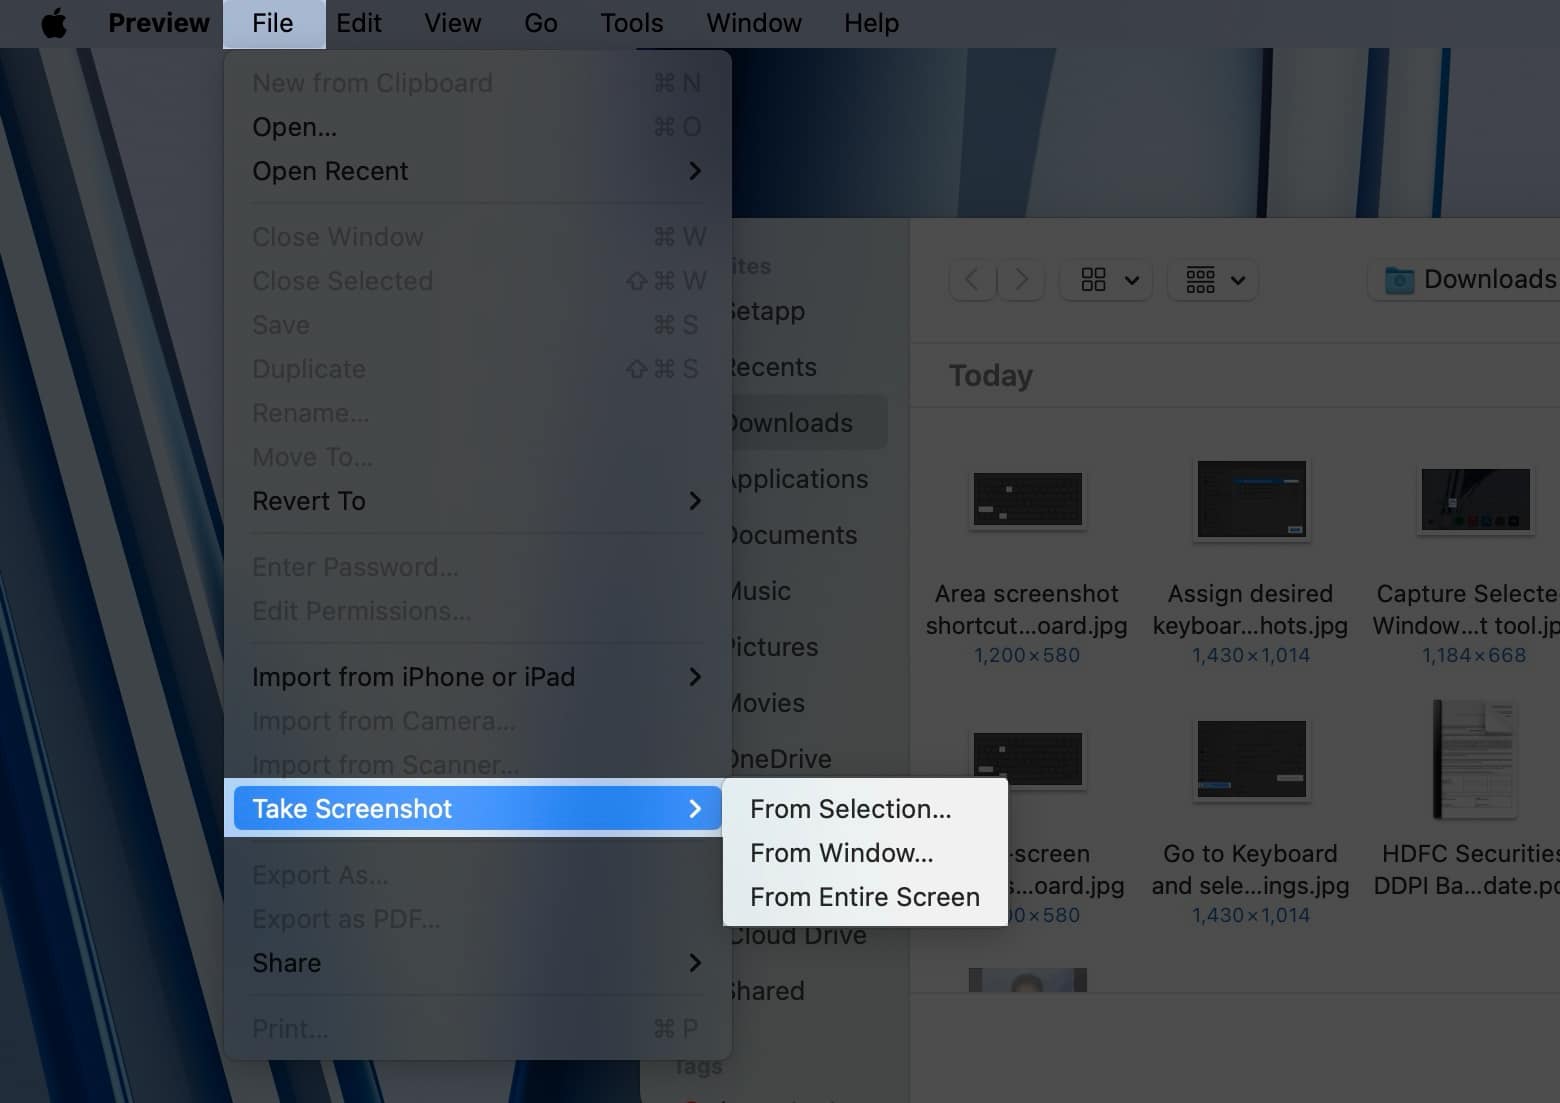
Method 2: Using Preview app
While taking screenshots using the Mac Screenshot app is handy, you can do the same with the Preview app. Tip: Suppose you want to take a screenshot of Chrome using Preview. For this, open the Preview app to get the menu for Preview in the top bar. Do not click the Chrome window. If you click it or any other app window, that menu will take its place on the top bar.
How to copy screenshot on your Mac without saving them
When you take a screenshot, it is saved to the desktop or place decided by you. However, we have figured out an additional throwaway method to grab a screenshot and get it copied to the clipboard automatically. This won’t save the actual file. You can paste the screenshot in apps like Notes, Word, Google Docs, etc., or even paste it on your other Apple devices courtesy of Universal Clipboard.
How to change default location of saved screenshots on Mac
By default, screenshots are saved on the desktop for easy access. You will find all of them here. Pro Tips:
If you have several screenshots, select them all, right-click, and then choose New Folder with Selection. You can also drag the screenshot thumbnail to any folder.
To change the default location of saved screenshots on Mac: All future screenshots will be saved in the selected location. This setting will stay in effect even if you restart the Mac.
How to take a screenshot of the full webpage on Mac
In iOS, you get a default option to take the scrolling screenshot of the entire webpage in Safari. Unfortunately, this option is not available for macOS. To capture the whole webpage on Mac, you will have to rely on two workarounds. The first one involves exporting the webpage as a PDF, and the other requires using a Developer tool. But before we begin, make sure that you’ve fully loaded the webpage you’re trying to capture. Otherwise, you may miss out on data that still needs to be refreshed.
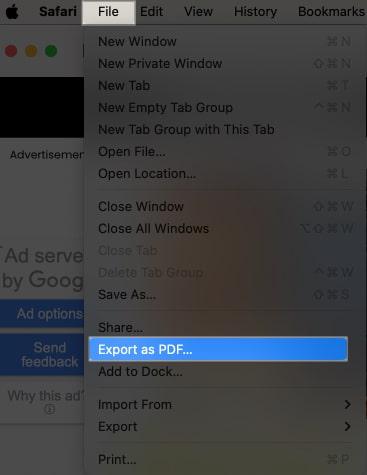
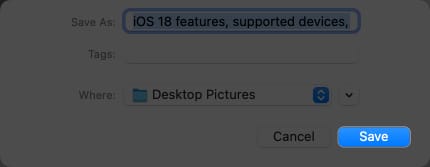
Export as PDF
The simplest way to take a screenshot in Safari is to export the page as PDF.
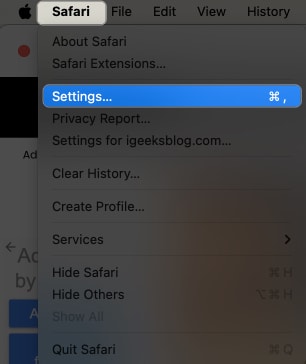
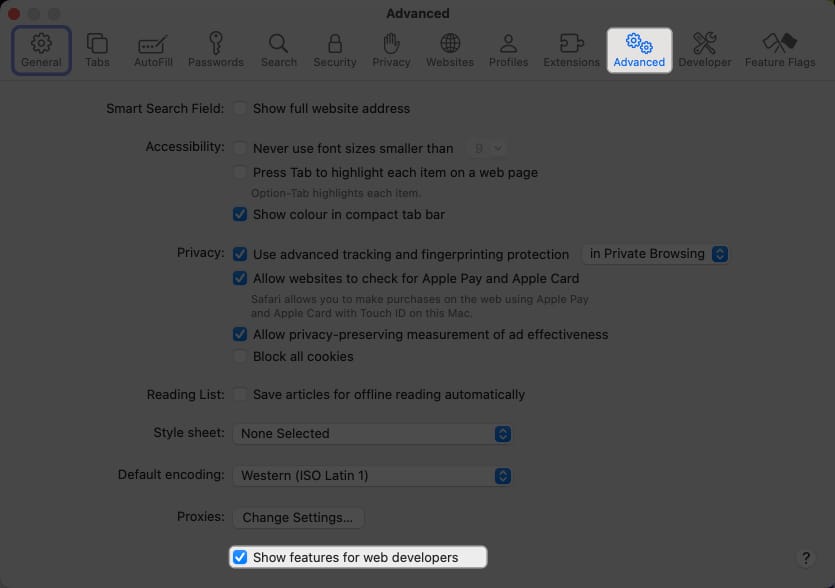
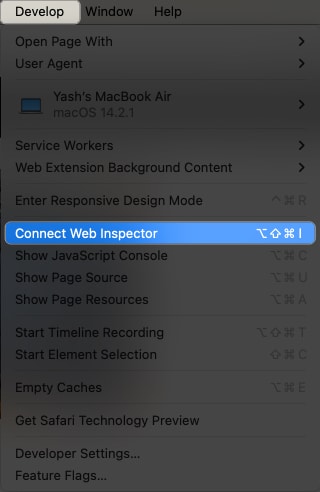
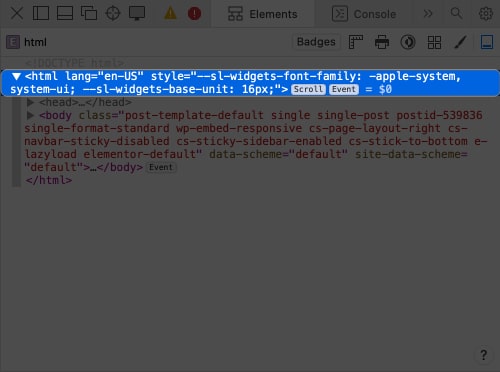
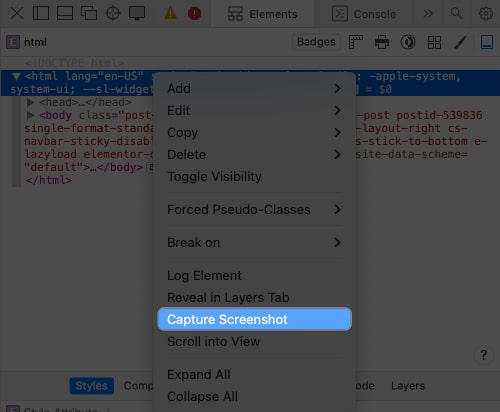
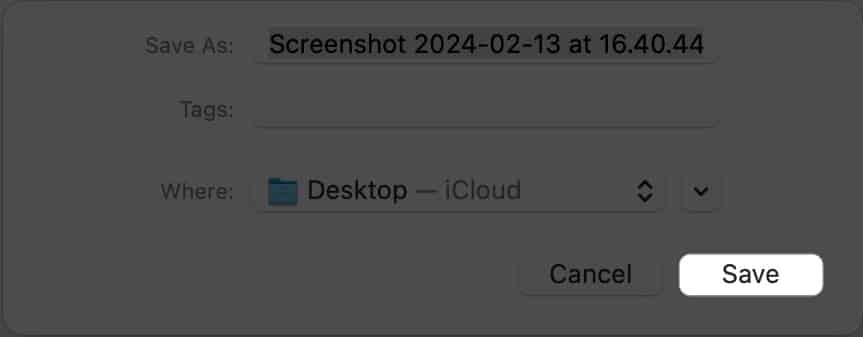
Developer tools
The above method provides the output in PDF format. If you are sure that you want an image of the web page, you can enable and use a Developer tool. Here’s how it is done.
Best third-party apps to take screenshots on Mac
By default, Mac offers multiple ways to take your desired screenshot. However, remembering all the keyboard shortcuts is indeed daunting. So, you may try using third-party screenshot apps for Mac, such as:
Monosnap Lightshot Screenshot Shottr
These apps offer several benefits that allow you to annotate screenshots or share them directly. You may also revamp hotkeys and take scrolling screenshots.
How to edit screenshots on your Mac
Once you have captured the screenshot, click the floating thumbnail or open the screenshot in the Preview app. Then click the markup button from the toolbar. Now, you can add shapes, draw anything, put your signature, overlay texts, adjust screenshot colors, resize the image, and much more. Edit the screenshot accordingly and save it. To learn more about editing screenshots, take a look at our detailed guide on how to use the Markup tool for the same.
Screenshots not working on Mac? Here are the fixes
Have the above-mentioned keyboard shortcuts failed to take a screenshot on your Mac? Then, you must ensure the Keyboard shortcuts are enabled. Also, you can check if the screenshot shortcuts have the default commands that you are using. Otherwise, your Mac will not recognize your shortcut command. To understand how these solutions and more can be employed, go through our troubleshooting guide on how to fix the screenshot not working issue on Mac. Wrapping up… I hope this guide was helpful in demystifying the process of taking screenshots of your Mac. If you have any more questions or suggestions on this guide, feel free to drop them in the comments below. Happy screenshotting! 🗣️ Our site is supported by our readers like you. When you purchase through our links, we earn a small commission. Read Disclaimer. View all posts
Δ
![]()
![]()