How To Save Image On Mac 4 Simple Ways To Do It
In this guide, I’ll explain how to save images from a website and native apps like Mail and Messages. I’ll also show you some browser extensions that should make saving images from the web easy. So, why wait? Let’s start saving!
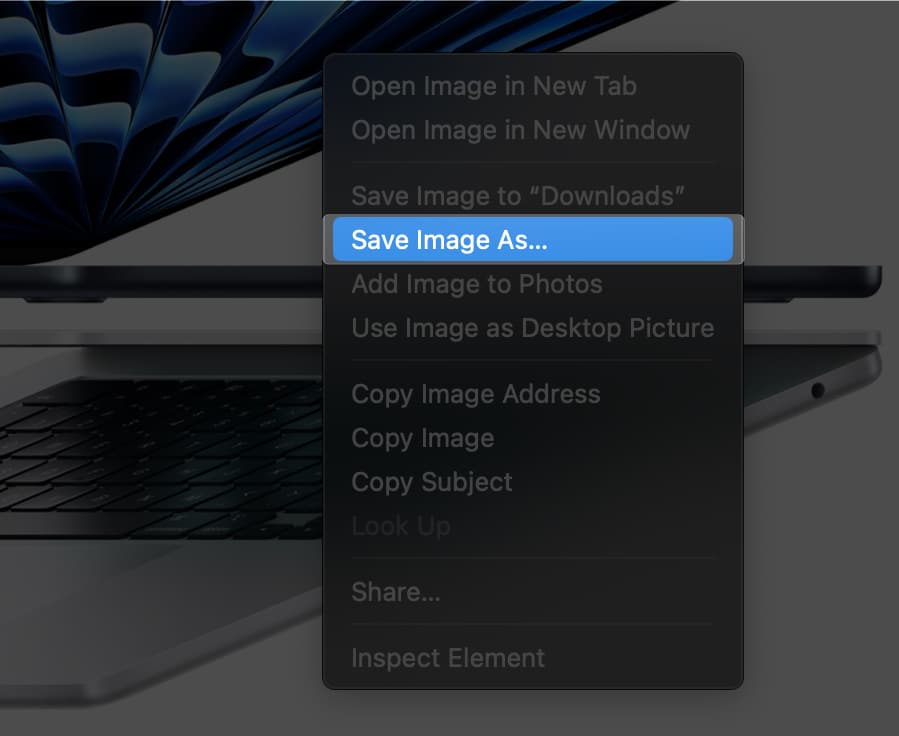
1. Save an image on your Mac by right-clicking
This is the easiest way to save pictures from websites on a Mac. Not only that, if you’re doing this inside Safari, you also get the option to Add Image to Photos, letting you add an image to the iCloud Photo library. If the website you are on doesn’t show the Save Image As option, don’t worry. You can use the third-party browser extension method explained below to save such pictures.
2. Use drag and drop to save a picture on Mac
Another easy way to save images is to use Mac’s drag-and-drop functionality. You can drag an image from one window or app to another.
3. Take screenshot to save image on Mac
In case you don’t want to go through the hassle of saving images manually, you can quickly take a screenshot on your Mac and save the image directly on the Desktop. The only downside of this method is that you may need to cut the screenshots after capturing them to remove unnecessary elements, and the resolution of the original image won’t be preserved.
4. Use third-party browser extensions
While the first three methods can help you save images from the web, some websites may not allow you to download images at all or only allow you to download images in unsupported file formats like webp or avif. Luckily, third-party browser extensions can help you overcome this issue. Additionally, these extensions can also help you download images from all websites as either a PNG or JPG file. If you’re using a Chromium-based web browser like Google Chrome, Brave, or Microsoft Edge, you can install the free Save images as Type extension available on the Chrome Web Store. On the other hand, if you’re using Safari, you can get the Save images as Type extension from the App Store for $2.99.
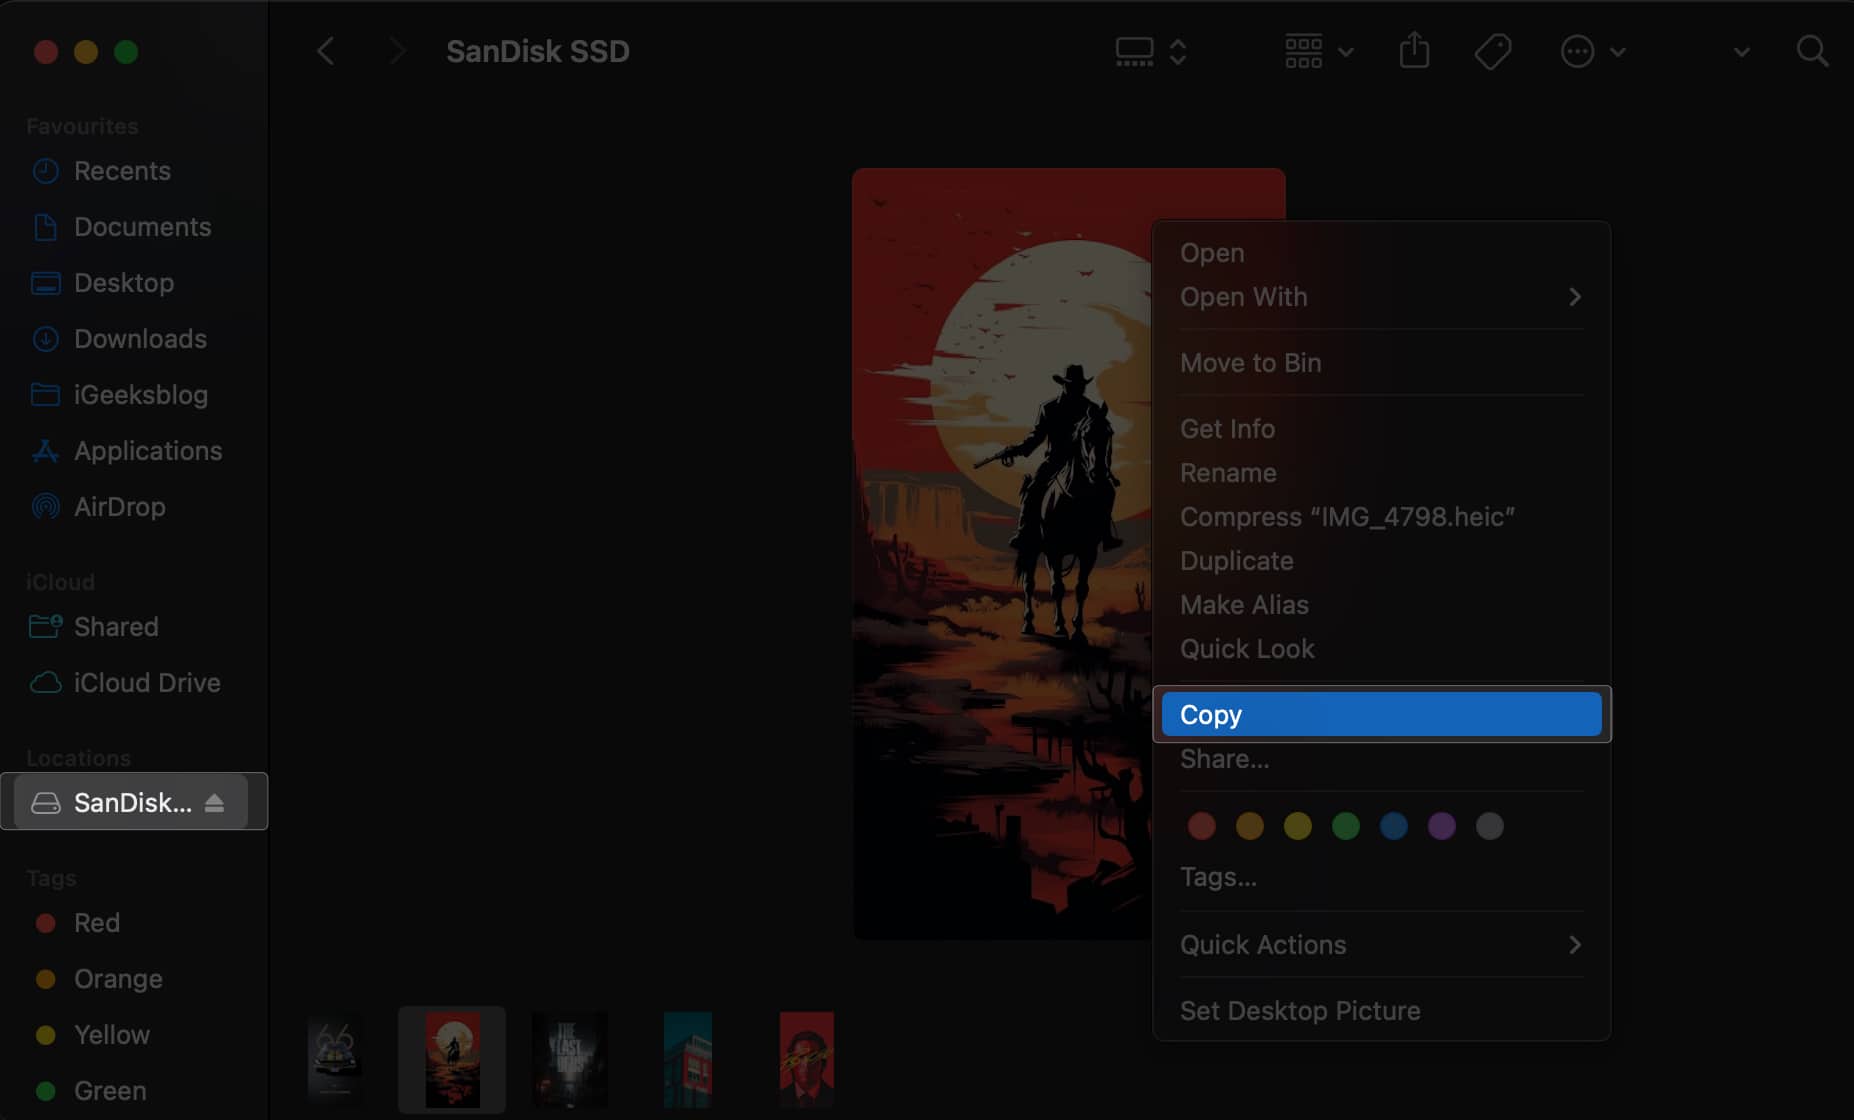
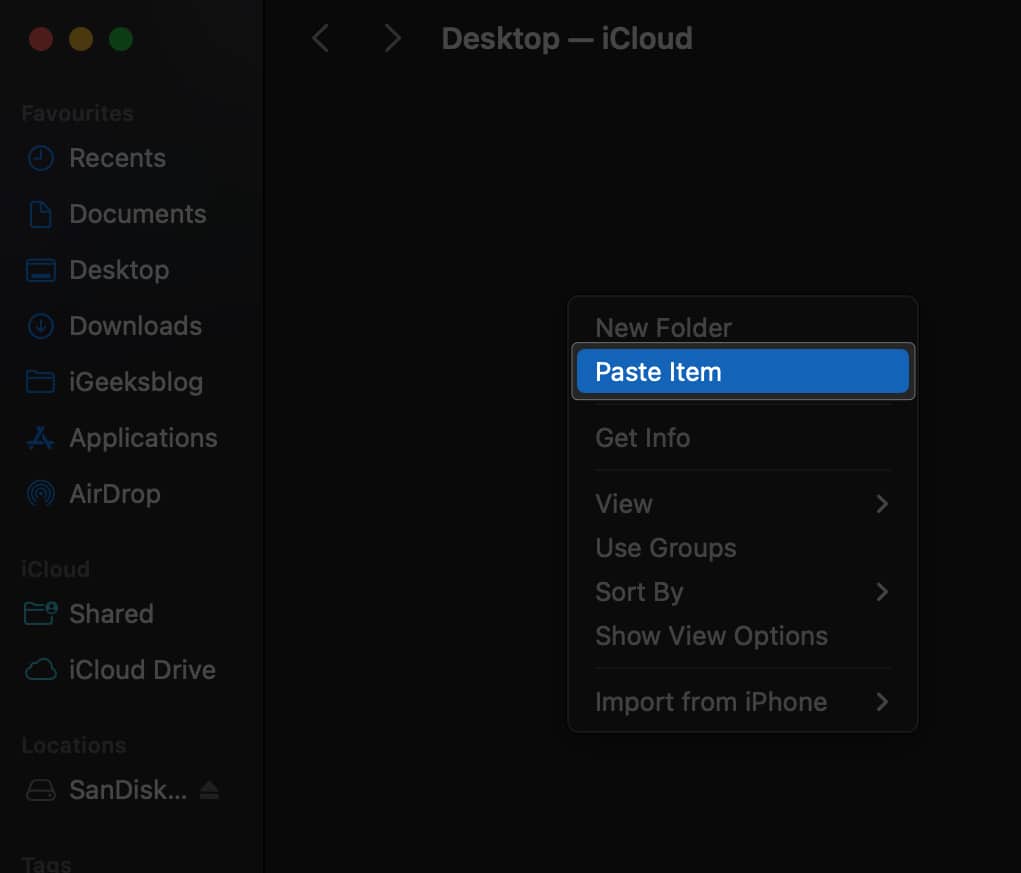
5. Save images from an external storage device on Mac
Saving images on your Mac from an external device like an SSD/HDD, USB flash drive, SD Card, or smartphone is just as easy. It is especially useful if you have lots of photos or albums you want to save on your Mac.
6. Save images from other native apps on Mac
The previous methods should help you save images from the web or external devices. However, there are also different methods for saving or downloading photos from other native apps on your Mac. Here’s how to save images from the Mail, Messages, and Photos apps on Mac.
Save an image from Messages
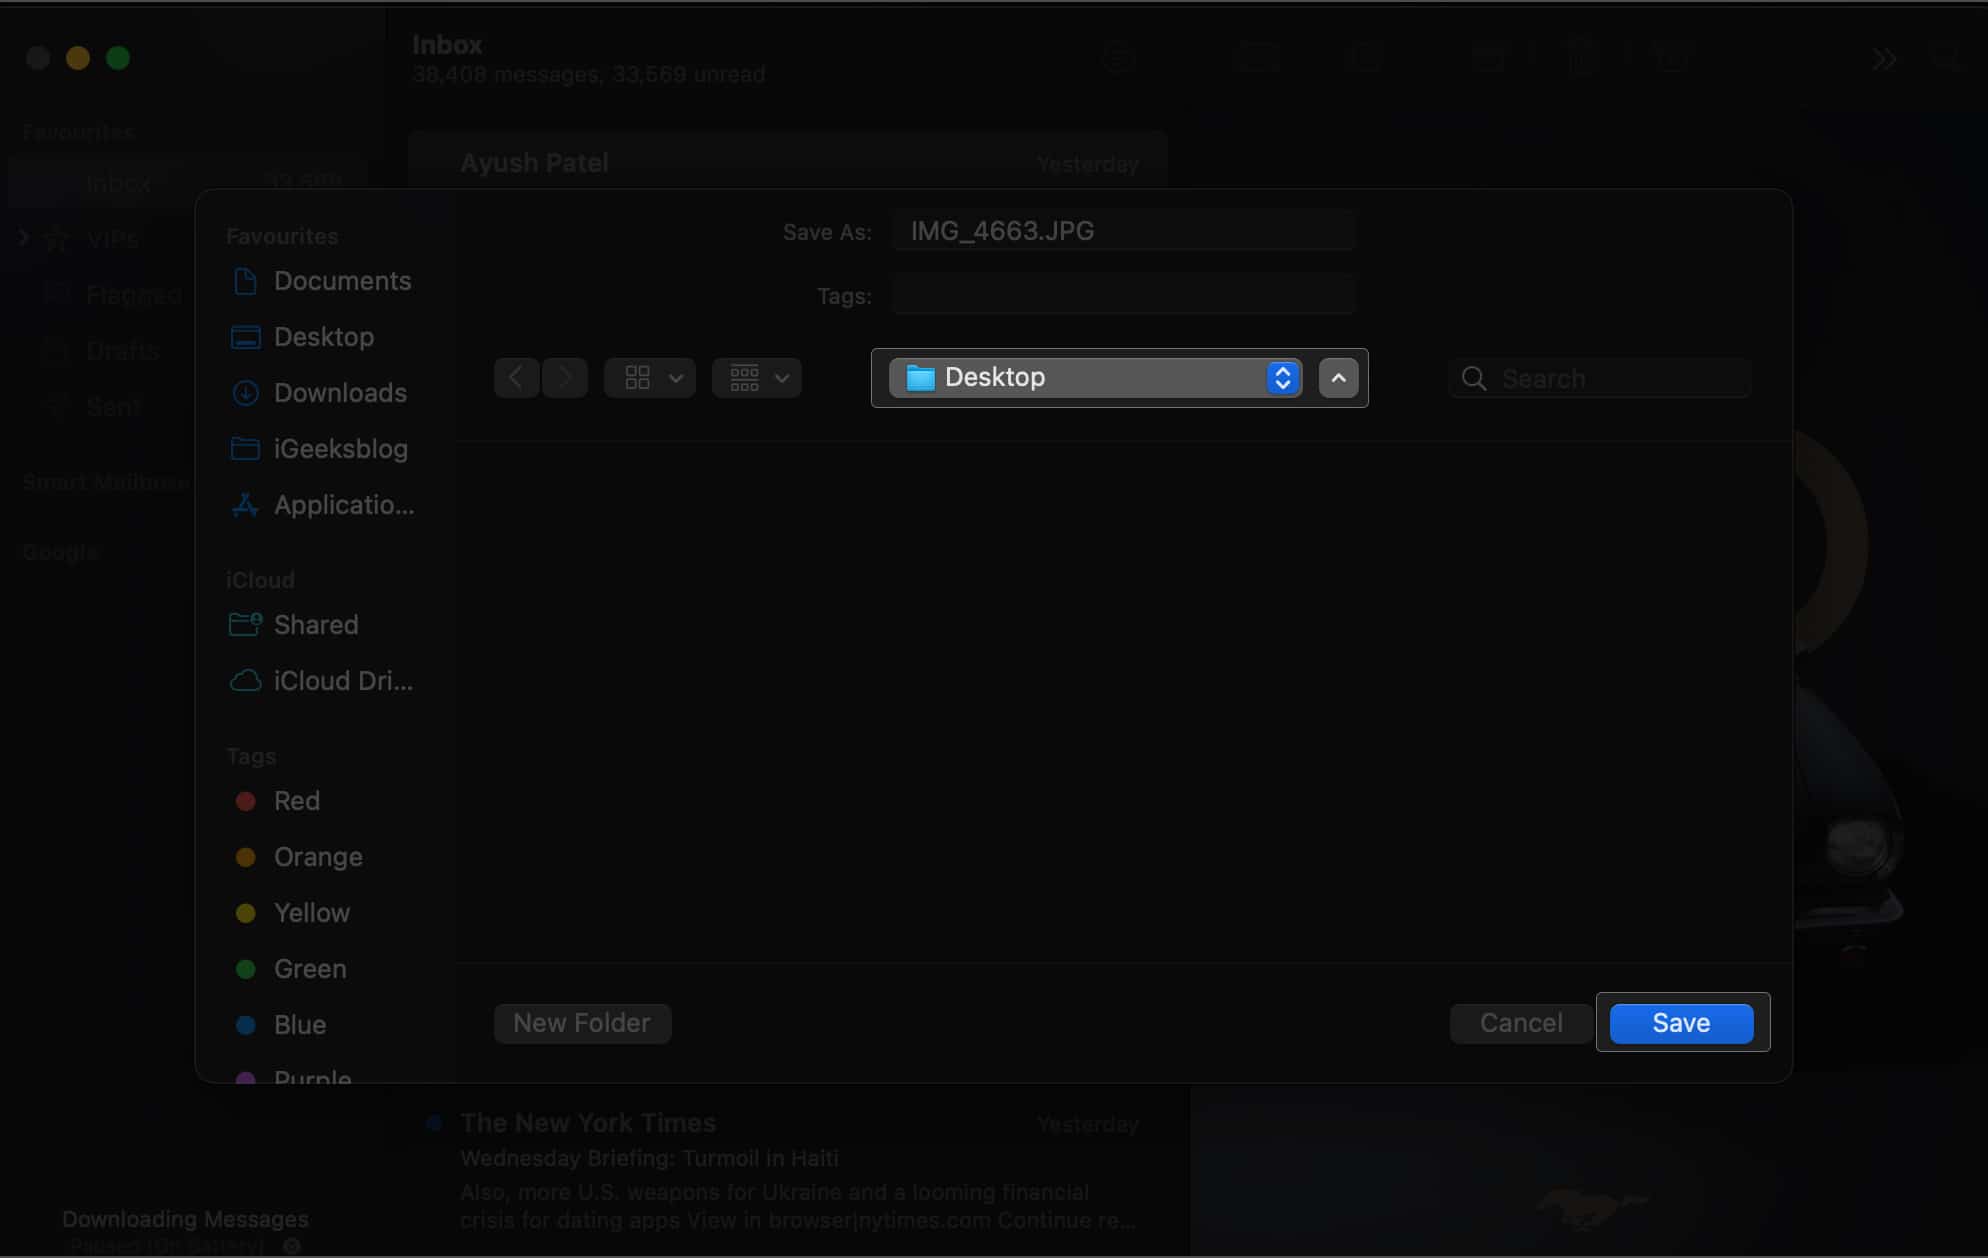
Save images from Mail app
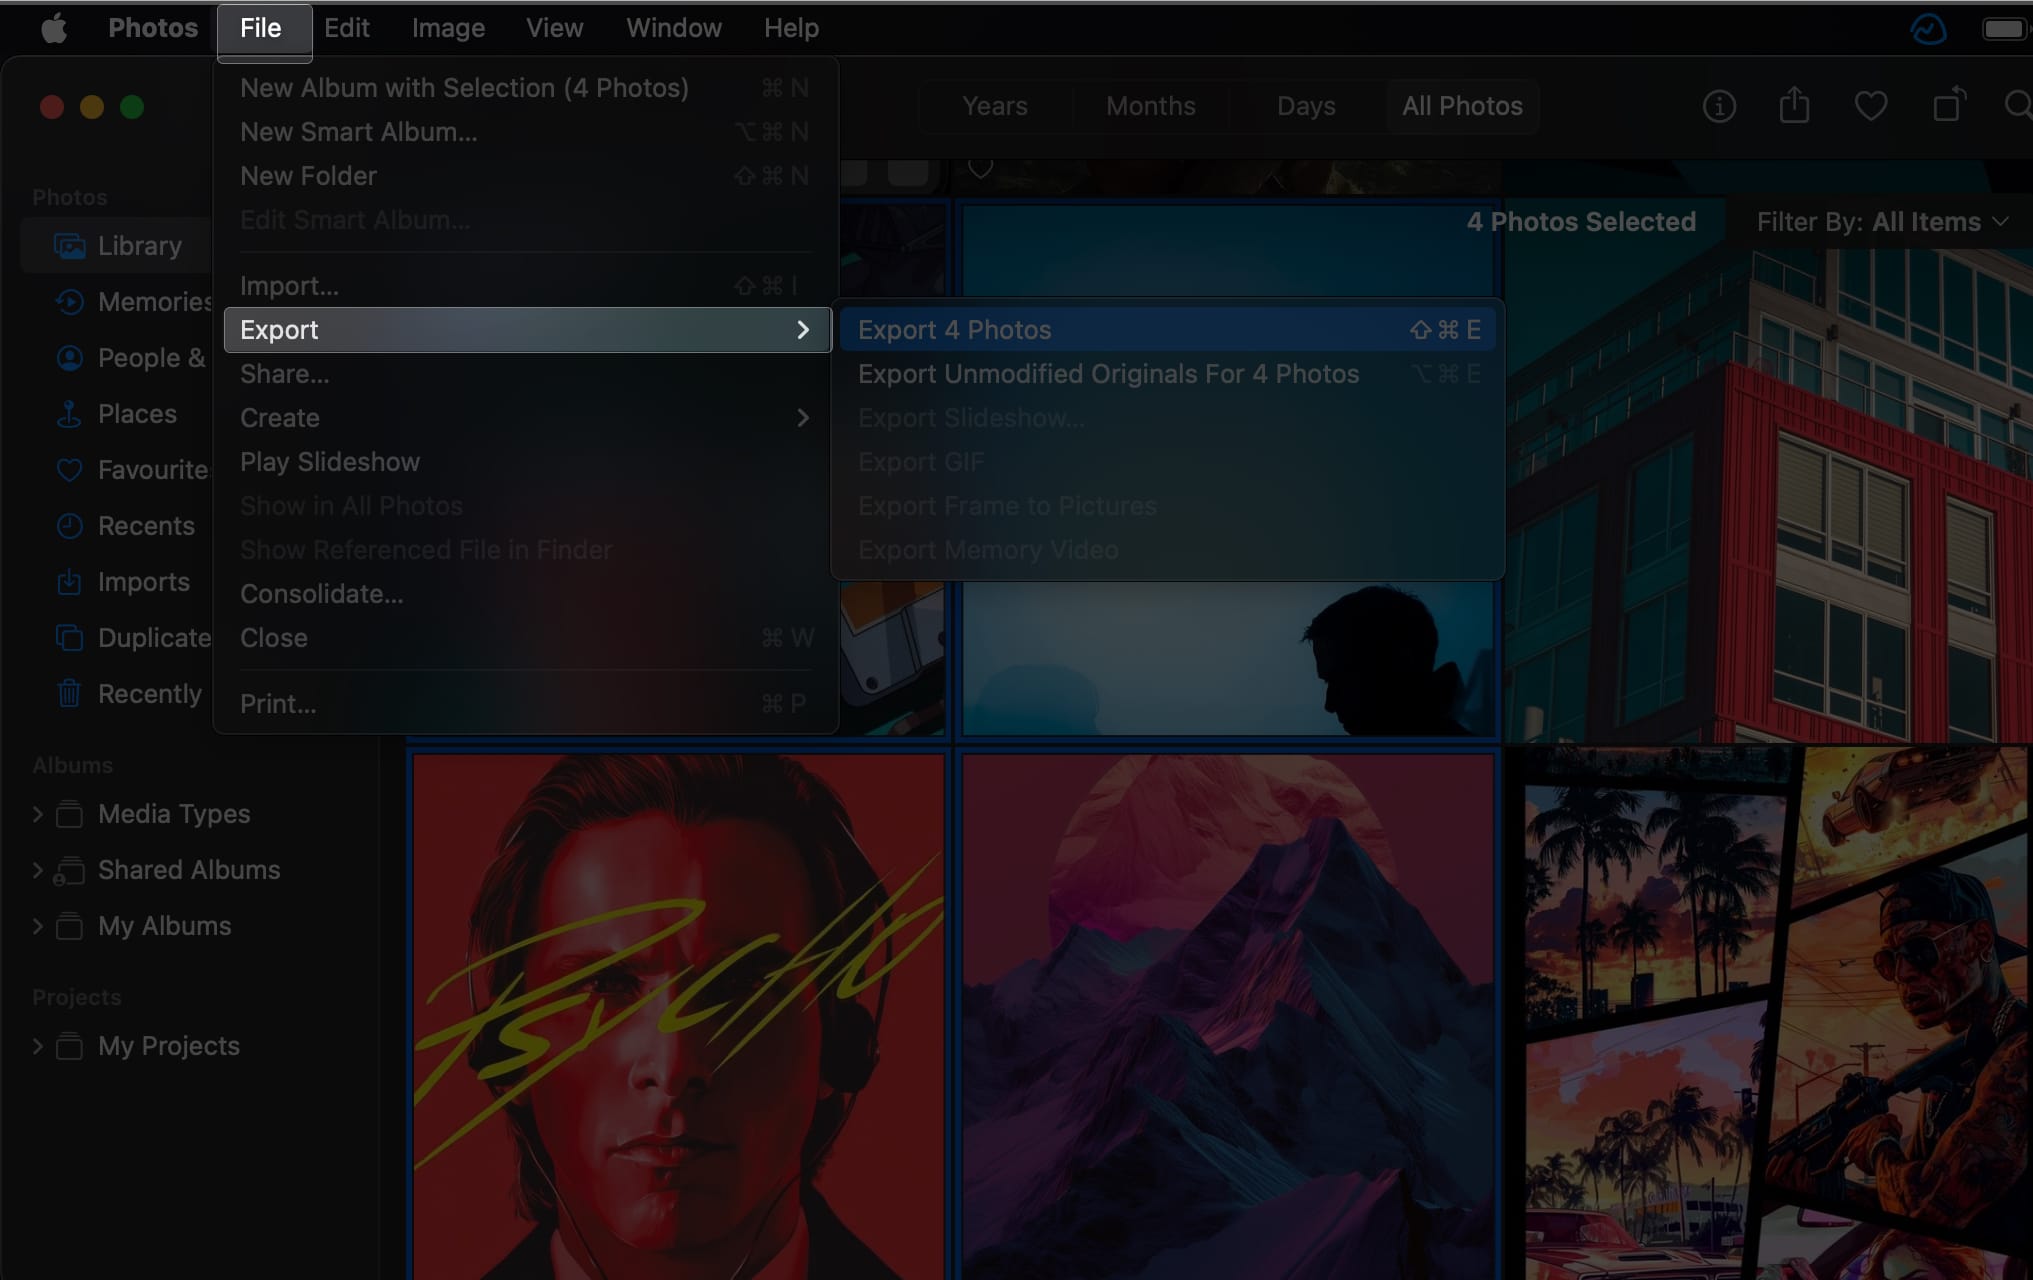
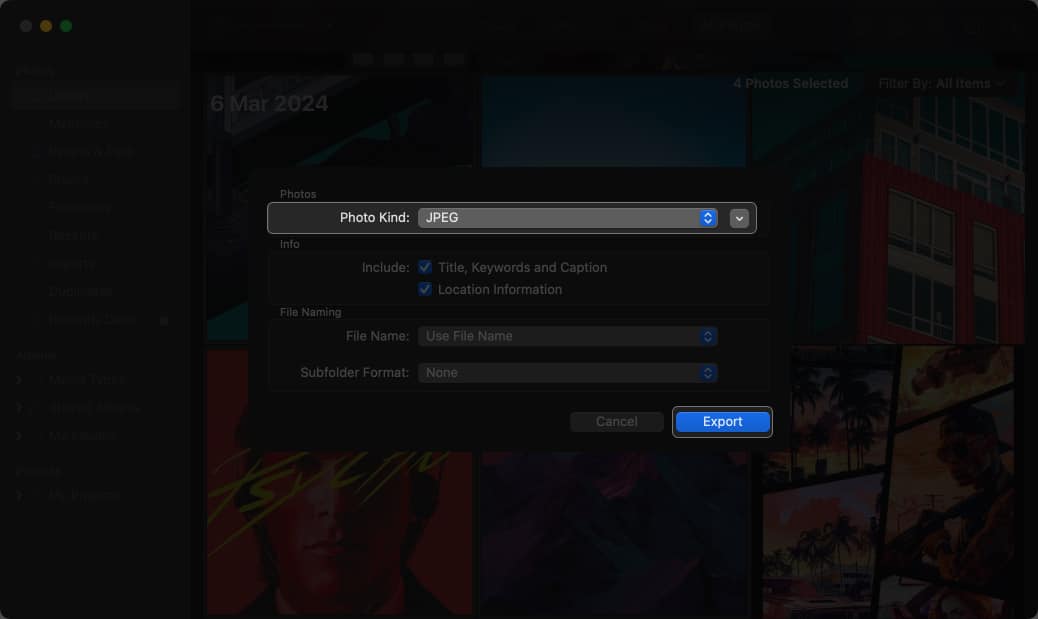
Download images from Photos app
If you are looking to save images from iCloud, you can check out our detailed guide on how to download iCloud Photos. Wrapping up… All in all, saving images on the Mac can be a breeze with several methods at your disposal. Whether you prefer right-clicking on an image or using the drag-and-drop technique, you can quickly save an image on your Mac. Moreover, you can even quickly save pictures from native apps on your Mac. Did you find this guide helpful? Feel free to share your thoughts in the comments section below. 🗣️ Our site is supported by our readers like you. When you purchase through our links, we earn a small commission. Read Disclaimer. View all posts
Δ
![]()
![]()