How To Remove Sent From My Iphone Email Signature
How to remove ‘Sent from My iPhone” email signature
Follow the below steps to remove the ‘sent from My iPhone’ email signature on your iPhone. It’s pretty easy, and you can do it in just five simple steps:
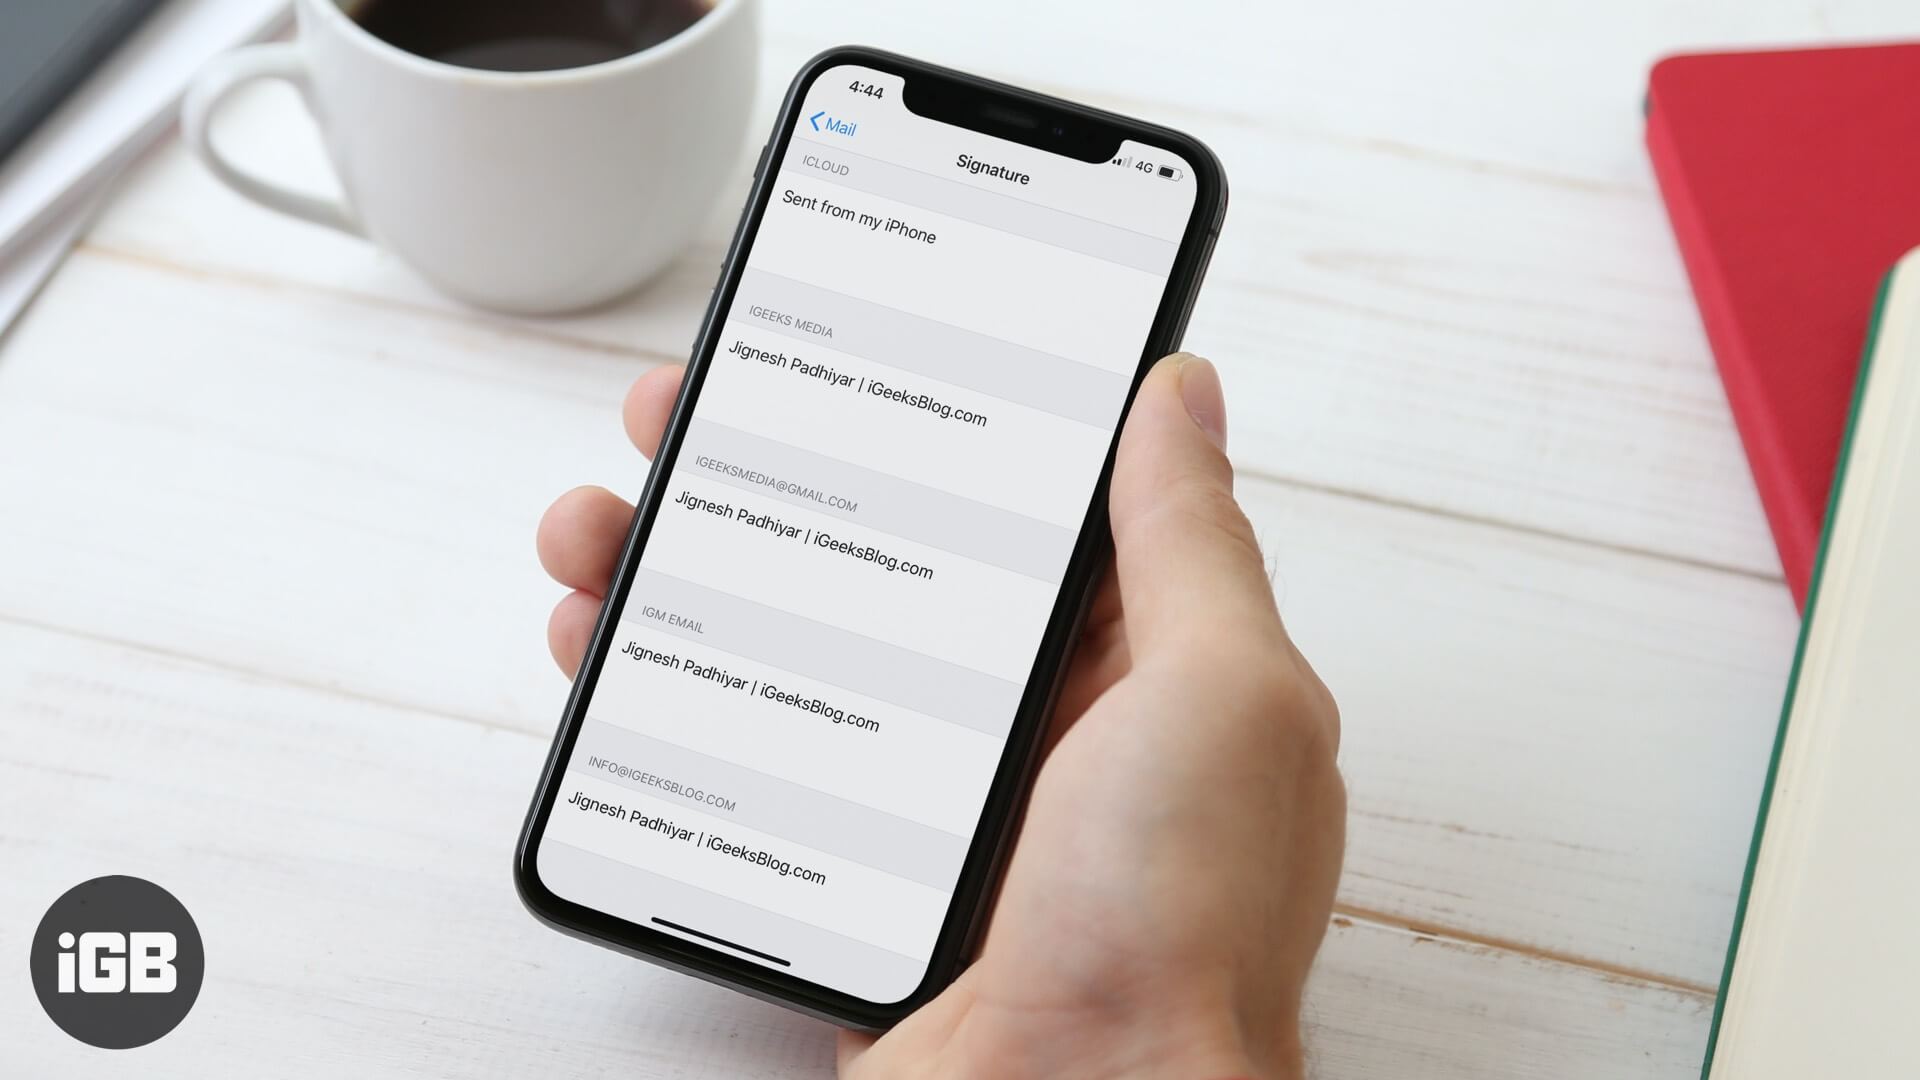
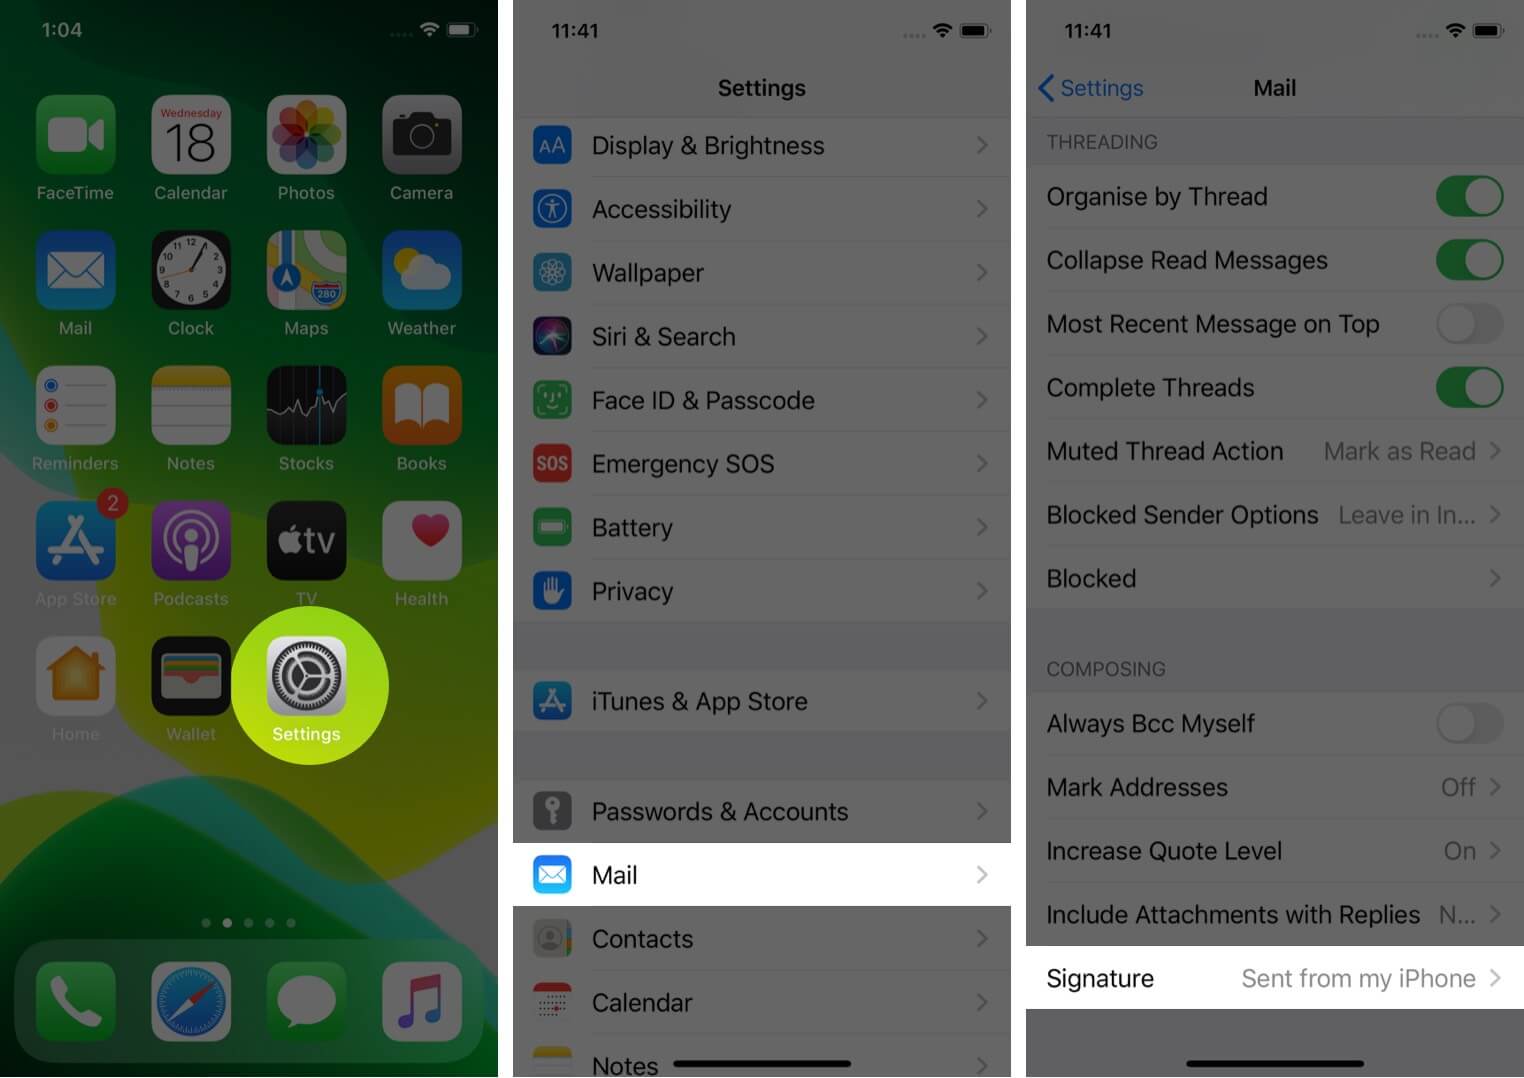
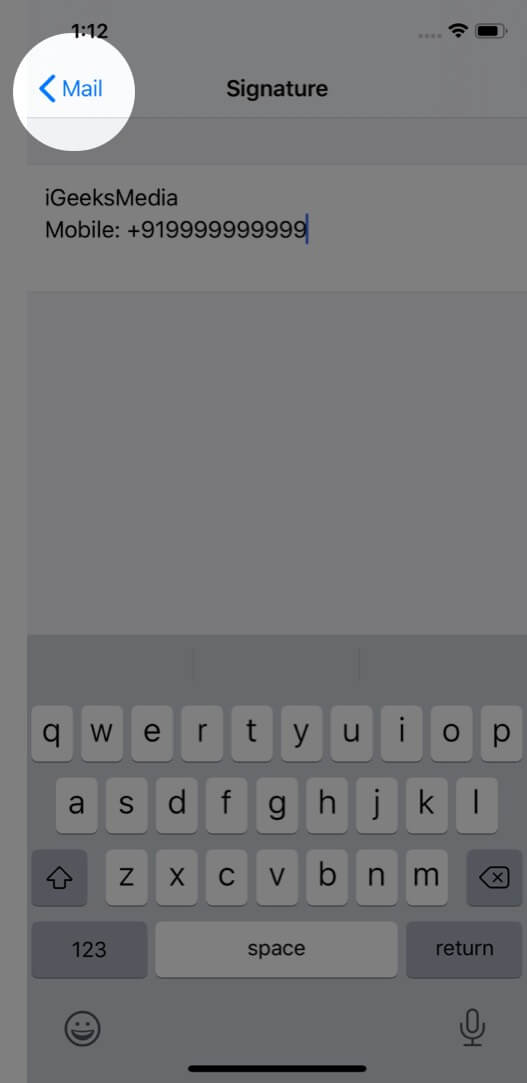
- Open the Settings app on your iPhone.2. Tap on Mail.3. Scroll to the end and tap on Signature. Note: If you have more than one account set up in the Mail app, you can choose All Accounts or Per Account.4. Here delete the entire Sent from my iPhone text. You may leave it blank or add something else in place of it. Like your name or contact number.
- Tap on <Mail from top left. The default iPhone Mail app signature has been successfully deleted (or replaced.) The same method applies for iPad as well, if you want to change or remove Sent from my iPad signature. That’s all, mate! Signing Off… So do you prefer to remove ‘Sent from my iPhone’ email signature or do you like keeping it there? And do you use the default Mail app or prefer some alternatives? Share your opinions in the comments below. You may also like to read…
How to Add iCloud Email Account to Your Android Phone How to Highlight Emails with Color Code in Mail App for Mac Best electronic signature apps on iPhone
What do you think about Apple’s default email signature? Share your opinion in the comments down below. 🗣️ Our site is supported by our readers like you. When you purchase through our links, we earn a small commission. Read Disclaimer. View all posts
Δ
![]()
![]()