How To Password Protect Folders On Mac In 3 Simple Ways
How to Password protect a folders using Disk Utility
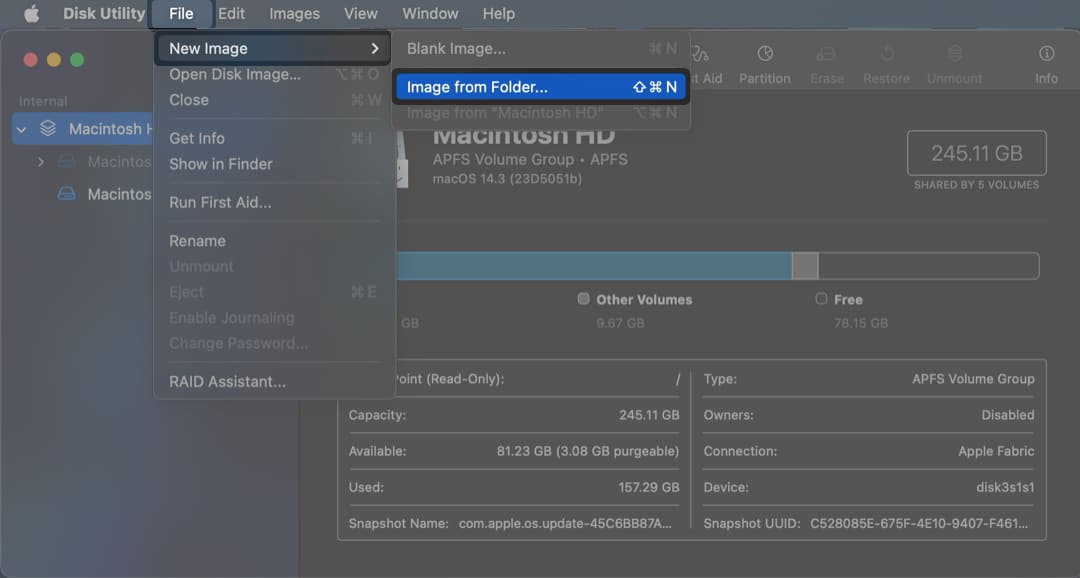
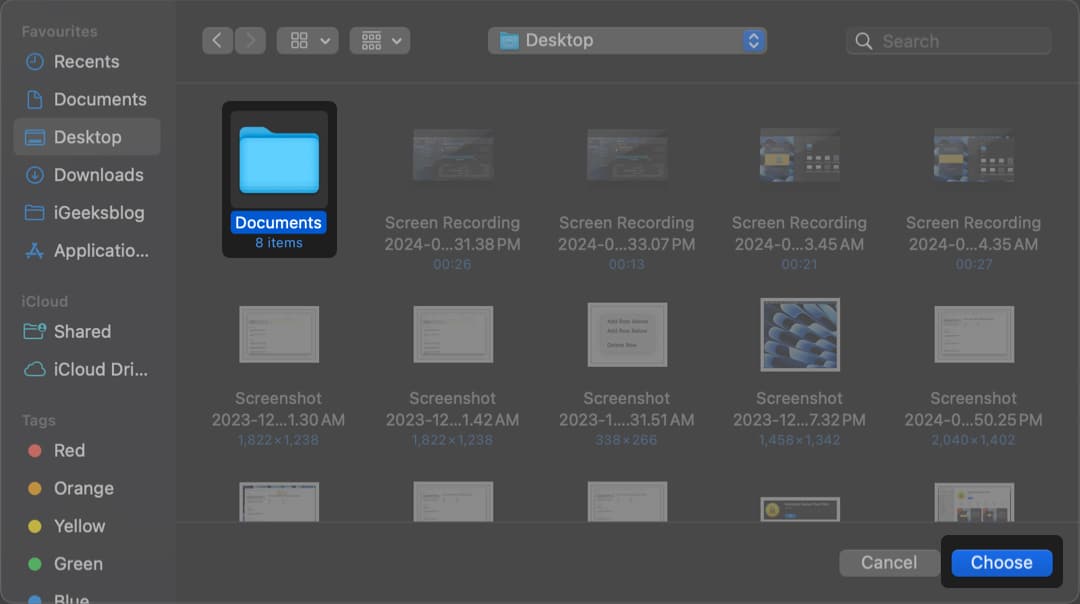
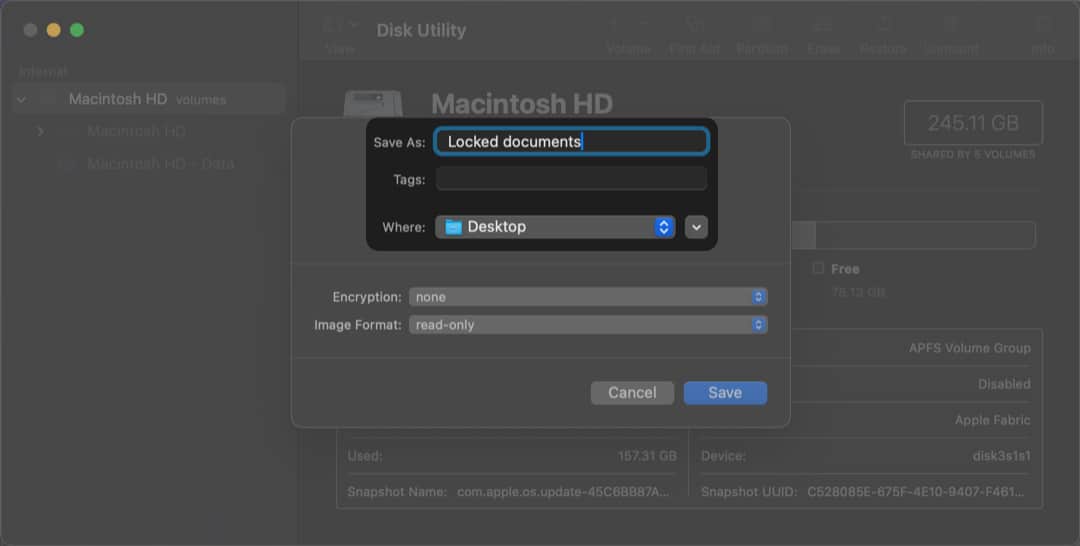
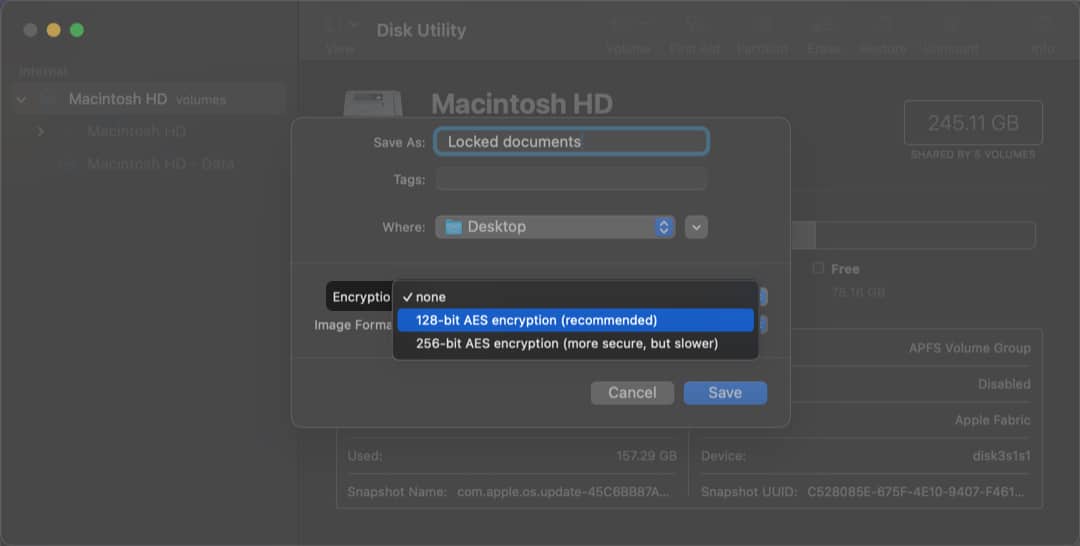
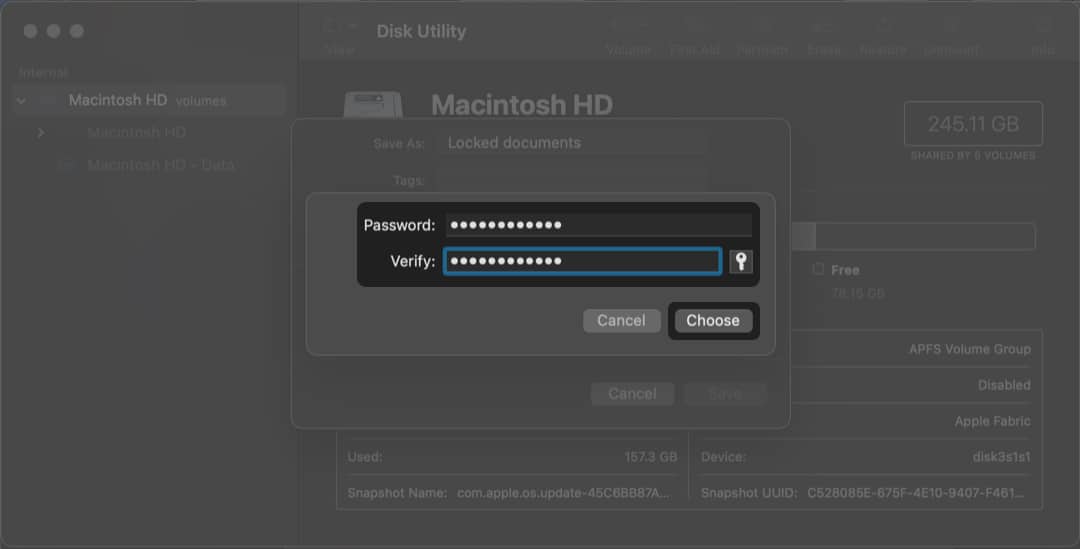
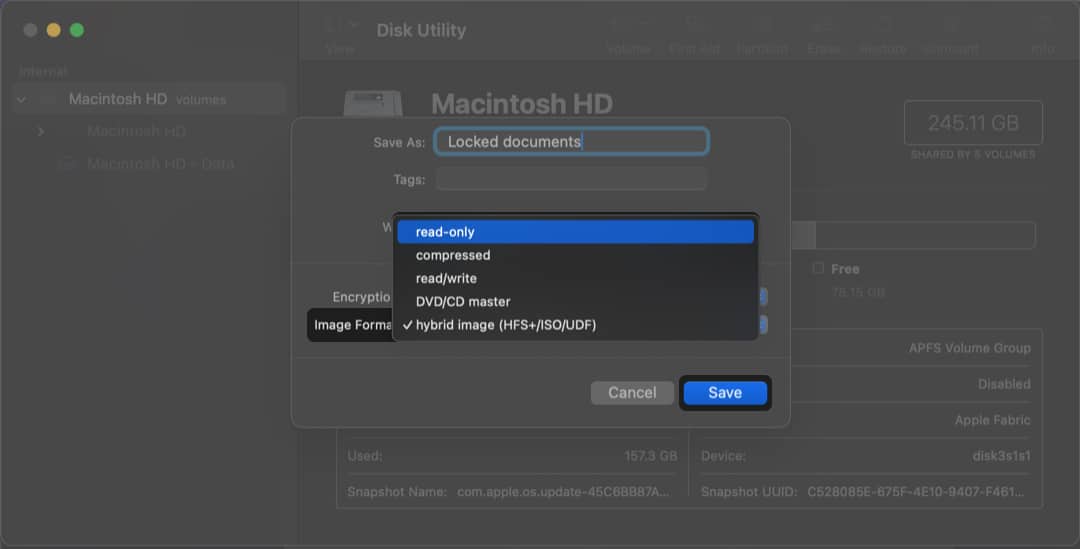
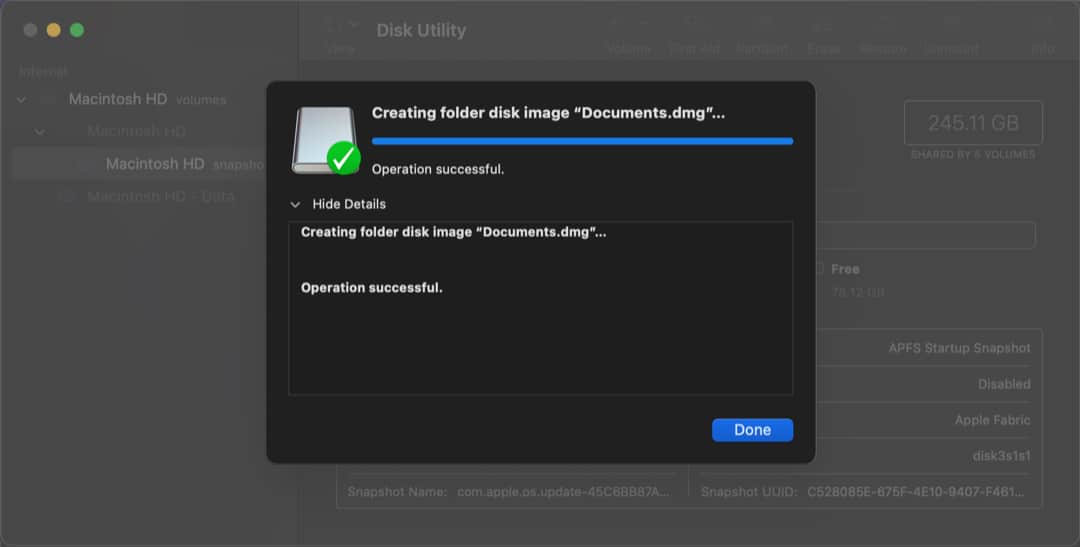
One of the easiest ways you can password-protect a folder on a Mac is by creating an encrypted disk image for the folder using Disk Utility. This tried and tested method lets you set a custom password and select a type of encryption for the locked folder for added security. Here’s how it works: Once you create a password-protected folder, it will show up as a .dmg disk image in the location where you saved it. You’ll have to enter a password to access the files saved in the disk image and eject it to lock the folder again.
Password protect folders using Mac’s Terminal
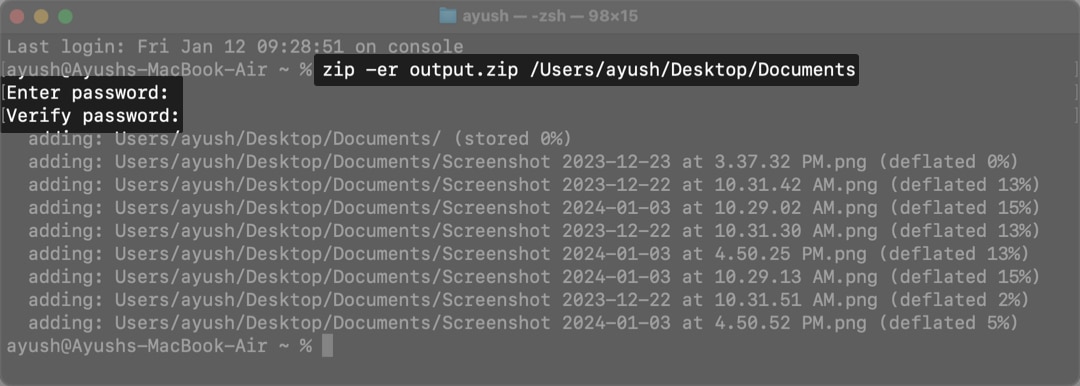
Yet another way you can lock folders on your Mac is via the Terminal. With this method, you can execute a simple command to create a password-protected zip file from a pre-existing folder. Here’s what you need to do: Now, if you wish to find and open the locked zip folder on Mac, do the following:
Lock your folders with third-party tools on Mac
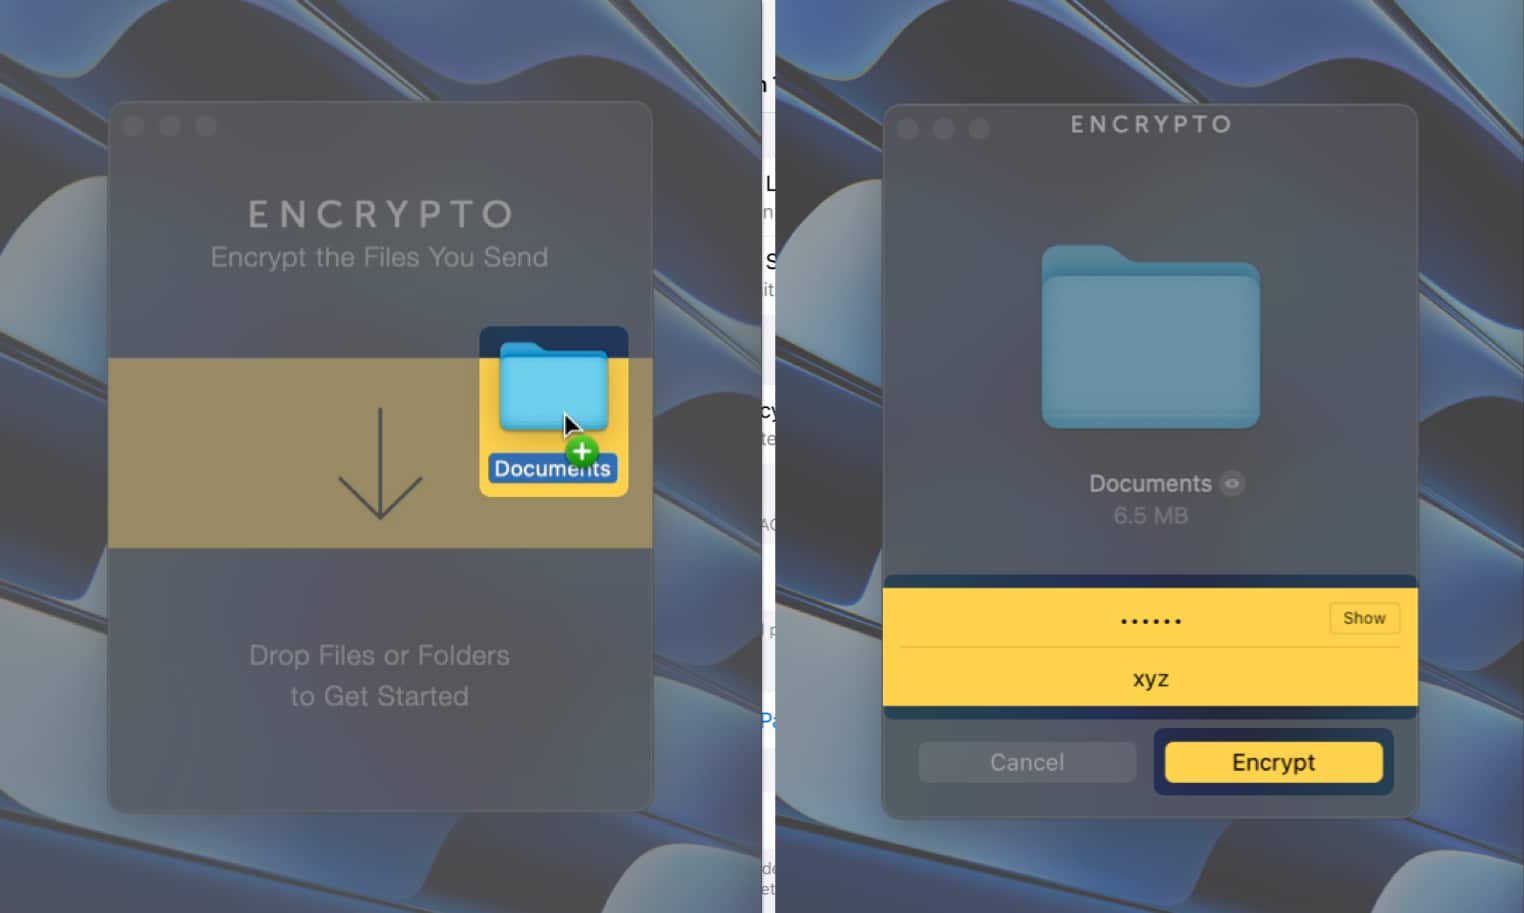
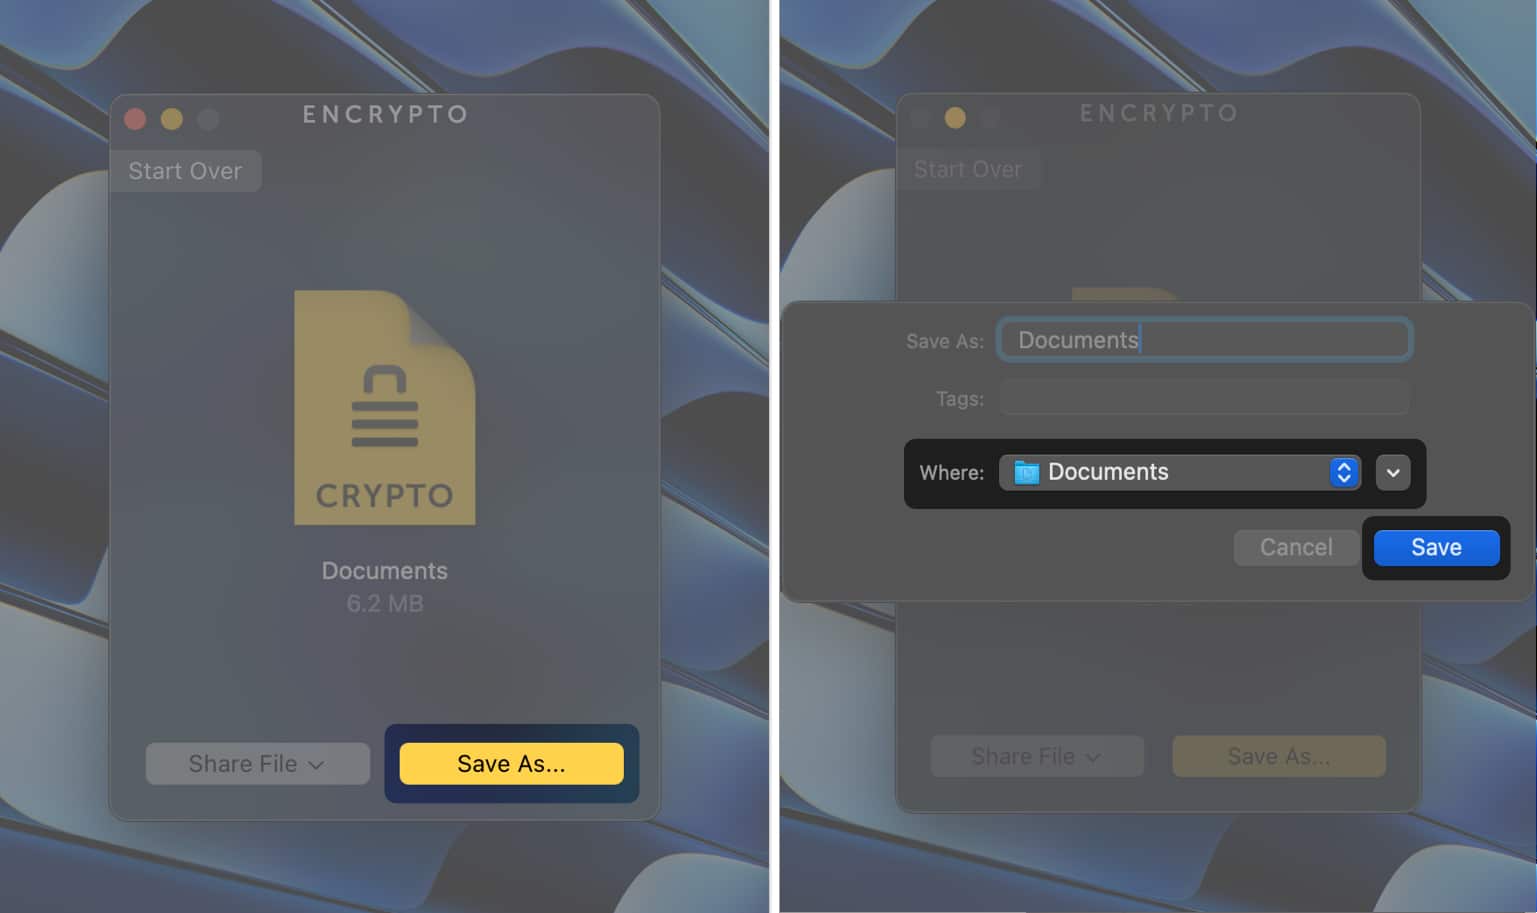
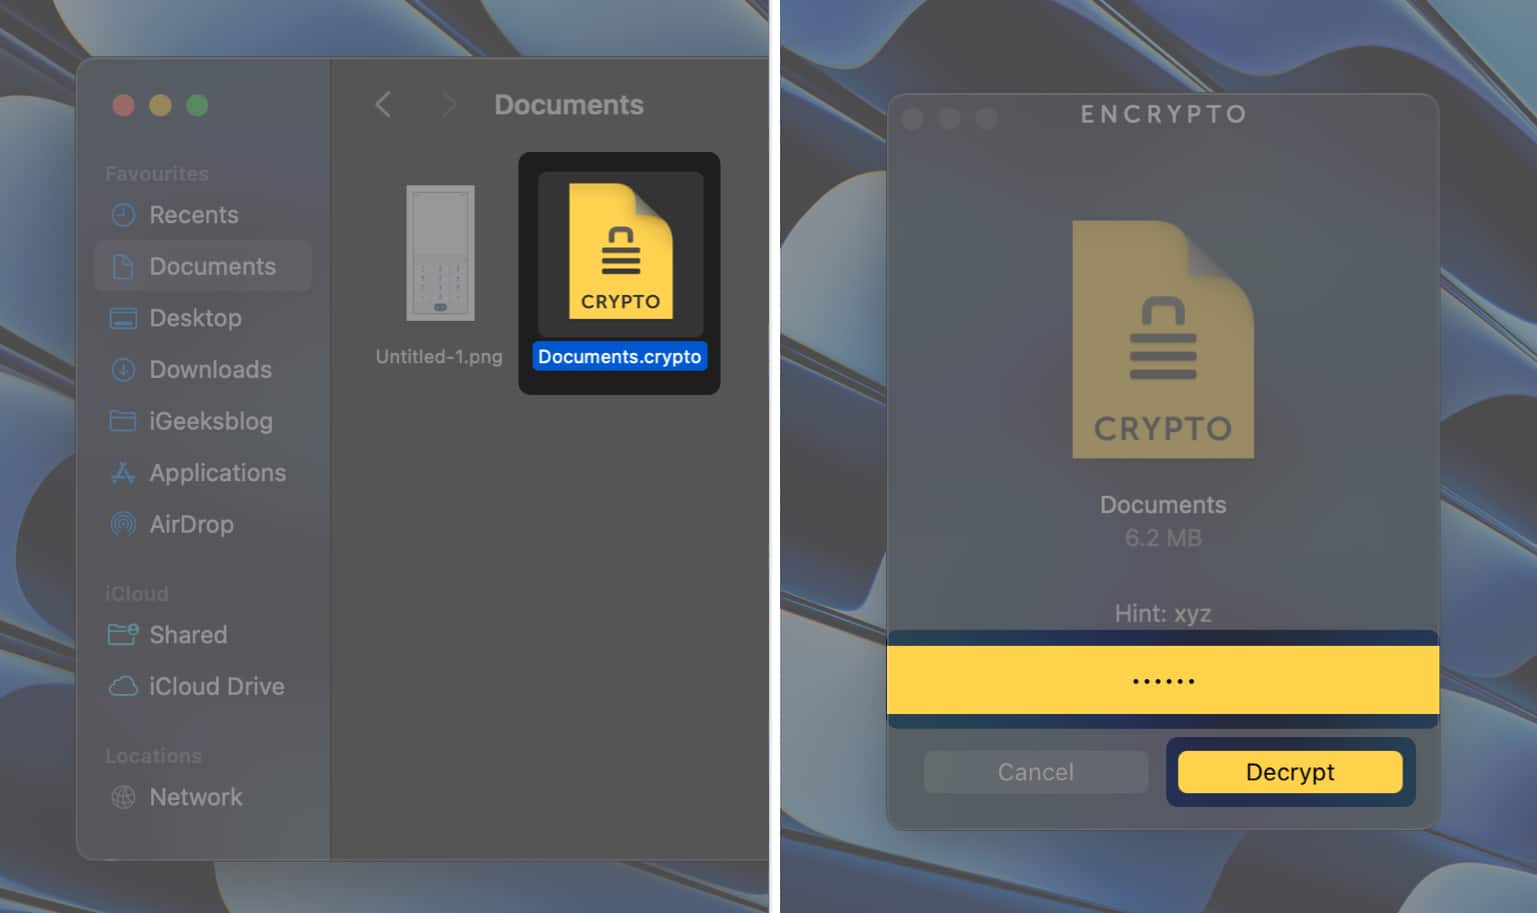
There are several third-party apps like Encrypto and Folder Lock, which can be used to lock your folder with a password. These apps offer a hassle-free method to lock folders on your Mac if you’re not comfortable using Terminal commands or Disk Utility. Here’s how you can encrypt Mac folders with Encrypto: Wrapping up… This is how you can quickly, safely, and freely lock a folder with a password on Mac. I hope this guide was helpful, and you learned something new. Finally, here’s an additional tip for you. If you do not want the folder to show up in Spotlight Search, add .noindex after the folder name. Also read:
How to password-protect PDF on Mac How to add a password to Pages document on Mac How to copy files and folders on Mac in 5 different ways
🗣️ Our site is supported by our readers like you. When you purchase through our links, we earn a small commission. Read Disclaimer.
Δ
![]()
![]()